Winter Warming Ginger Tomato Soup

Ginger Tomato Soup

This is one of my favourite soups in the winter. It’s fresh and gingery, a little spicy and very hearty. For a more brothy, soupy soup, you can reduce the amount of barley to 1/2 cup. The introduction of either chipotle pepper (a smoked pepper), or smoked paprika gives it a rich, rounded flavour. Fresh ginger gives a bit of a bite, but also a slight citrusy flavour that cannot be replicated with dried ginger.

Feel free to add in any random veggies, or leftover stuff in the fridge (within reason). This kind of soup can be a great ‘use it up’ meal!

Ingredients:

  • 1-2 tsp oil
  • 1 medium onion, roughly chopped
  • 2 stalks of celery, chopped (plus some of the celery leaves, if you like)
  • 6 medium mushrooms, halved or quartered (depending on size and preference)
  • 1-2 medium carrots, cut into thick slices
  • 1-2 large potatoes, cut into big chunks
  • 2tbsp fresh grated ginger (dried will be quite different, so I do not recommend it)
  • 2 cloves of garlic, pressed or finely chopped
  • 1 tsp chipotle pepper, powdered (if you don’t want spicy, you can use smoked paprika instead)
  • 1 cup corn kernels (can use fresh, frozen or canned)
  • 1 796 ml can of diced tomatoes
  • 4+ cups of broth (a lightly flavoured one, like vegetarian or chicken, can substitute with water if needed)
  • 1/2 cup of chopped fresh parsley
  • 1 cup of barley, dried
  • salt & pepper, to taste

Instructions:

  1. Heat oil in a pot on medium heat.
  2. Once heated, add onion and celery. Cook until golden and soft – can add a tablespoon or so of broth or water to help with this. Be sure to cook off any extra liquid before the next step.
  3. Add the mushrooms, and saute until soft and lightly browned.
  4. Add the carrots, potatoes, ginger, garlic and chipotle (or paprika). Stir, and cook for a couple of minutes.
  5. Add the corn. If you’re using frozen or cold corn, cook until the corn warms up a little.
  6. Add the diced tomatoes.
  7. Add 4 cups of broth (or water). Make sure the liquid covers the vegetables completely. Add more broth or water if necessary.
  8. Cover. Let this cook for about 20 minutes on low heat.
  9. Add the barley. Cover, and cook for 30 minutes, or until barley is cooked through. Stir occasionally, and check to make sure everything is still covered in broth. Add more broth or water as needed.
  10. Add the chopped parsley and chopped peppers. Cook for another 10 minutes.
  11. Add salt and pepper, to taste.

Monthly Mélange: February 2010

Noodles!!

February was my first full month of blogging about food, and I packed it full of new cooking experiences. This has really helped to battle my usual winter blahs. I hope to keep things coming at the same frequency.

Here’s a rundown of some of my culinary highlights of February 2010. If there’s anyone out there reading my blog, feel free to comment with your own rundown of the month!

How did February 2010 taste?

Wrapping up the Waste
The 2010 Food Waste Reduction Challenge is now over, and I can say that it was interesting to see just how much edible stuff we throw out every month. I suppose it’s less of a wake-up call for me, because I’ve always tried to use up everything I can. There are still a few weak spots – frozen items moreso than fresh foods. I can do better there. Planning meals helps with this, and only buying the items you really need for the meals you have planned.

Monthly Spice
I would probably say Berbere, because it probably was my favourite of the month, but it already got its own post. While making a Cajun-inspired shrimp dish the other night, I realized I had misplaced my Cajun mixed spices and had to make some up on the fly! Seriously, I realized I couldn’t find it RIGHT when I needed to add it in. Internet to the rescue, I found a couple of recipes that outlined the herbs and spices to use, and the proportions, and I was all set. The dish turned out great, by the way.

Mystery Ingredient
Leafy, leafy greens. I’m usually pretty good about eating my spinach (bought into the whole Lie of Popeye), but I never knew what to do with things like kale. This month, I chose some recipes that not only used lots of spinach, but also kale and collard greens. Sometimes referred to as a ‘superfood’, leafy greens contain many important nutrients, such as vitamin C, iron, potassium, magnesium, lutein, beta-carotene, folic acid and are high in dietary fiber (among other things). They’re pretty tasty, too!

I Made This!
Hubs says the best stuff I made this month was my Indian assortment, which I should be posting soon. I made three really yummy dishes, and overall we were more satisfied with these three than the Ethiopian three dishes (the closest competition – I wasn’t as impressed with the yellow lentil dish, so it lost some points there!). My favourite of the three Indian dishes was definitely the Saag Paneer – this is one of my all-time favourite Indian dishes, and it came out just the way I like it!! Joe’s favourite was a chick pea dish. Yum.

Shameful Secrets
I am happy to say that I haven’t had any Skittles since my last post, and have limited my Jelly Belly intake to 10 beans per sitting. My stomach has been doing much better, which is important since I’ve been cooking so much

On to March, and hopefully some longer days so my food pics turn out better!!

S

Ethiopian Feast!

I first tried Ethiopian food about 10 years ago, on the recommendation of a colleague. A vegetarian at the time, I was looking for new restaurants, and new flavours that didn’t involve eating Babe (or his little friends). When I go for Ethiopian food, I always get the vegetarian platter. All of the restaurants make these, and they often contain many of the same dishes (or variations of them). Comprised of a number of stews, the dishes may be spiced legumes (lentils, split peas), vegetables, collard greens, all placed in colourful mounds around a fresh salad, atop what can best be described as a sourdough pancake.

Injera, the aforementioned ‘pancake’, is an important part of the meal. It lines the platter, it provides the grain portion of the meal… and acts as your utensil. The flavourful stews are grabbed up, and masterfully rolled into a piece of injera, dipped in Awaze, and quickly popped into your mouth. Injera can be made at home, or bought from a number of stores that carry the handmade bread. It is traditionally made from Teff, the world’s smallest grain, which can be hard to find and expensive in Canada. We opted to buy Injera this time around, but my husband “the bread guy” thinks he could pull off a good batch next time (having found Teff flour at Rube’s in St. Lawrence Market).

A close-up of the platter. Clockwise from 12: Gomen, Mesir Allecha, Mesir Wat. Centre: Awaze. MMmmmmmm.

This meal is great for those who love complex flavours, varied textures, a little spicy kick and breaking ripping bread with friends.

This was my second attempt at making Ethiopian dishes. The first try did not go so well, and I gave up. This time, I figured I had a better feel for the food, hopefully a better eye for the recipes, and a new favourite condiment to devour.

In my earlier post, I mentioned Berbere, a very important spice blend in many Ethiopian dishes. I also mentioned Awaze, the bold and spicy condiment that is made from Berbere. This is my inspiration for trying again, and having successfully made a batch of Awaze, I was determined to make food worthy of being dipped in it.

Want some injera or spices? Toronto has quite a few places that carry these items, but the ones that we shopped at this time around are Piassa Ingera (260 Dundas Street East) and, oddly enough, the Hasty Market at King & Dufferin.

Looking for someone else to make it for you? Try Ethiopian House Restaurant (4 Irwin Avenue, Toronto)

Want to try making it for yourself? Here are recipes I followed (slightly modified from recipes I found online). Don’t forget to refer to the Berbere and Awaze post!!!


Niter Kebbeh (spiced, clarified butter)

This is the start of many great Ethiopian dishes. This butter is full of flavour, and really can’t be omitted from the dish (although I generally use less than recommended in the original recipes). I made this well in advance, let it cool in a rectangular dish, then chopped into cubes and frozen. I should have enough Niter Kebbeh for the next 3-4 meals, maybe more!

Modified from this Recipe

Ingredients:

  • 1 pound butter
  • 4 tablespoons onion, finely chopped
  • 1 1/2 tablespoons garlic, finely chopped or pressed
  • 2 teaspoons fresh ginger, scraped and finely grated or minced
  • 1/2 teaspoon turmeric
  • 4 green cardamom pods, crushed
  • 1 cinnamon stick
  • 3 whole cloves
  • 1/8 teaspoon ground nutmeg

Preparation:

  1. Slowly melt the butter in a medium-sized saucepan over low heat.
  2. Add the other ingredients and simmer uncovered on the lowest heat for about 20-30 minutes. Do not let it brown.
  3. Strain the mixture through a double layer of cheesecloth or a fine strainer, discarding the spices.
  4. Refrigerate until set.

Gomen (Stewed Collard Greens)

The collard greens have always been one of my favourite parts of the meal. Their slightly bitter, buttery deliciousness is a great contrast to the lentil dishes and is a must for any platter. I actually doubled this recipe when I made it, and found that this was the perfect amount.

modified from this recipe

  • 1 large bunch collard greens, about 1½ pounds
  • 1 tbsp niter kebbeh, ghee or olive oil
  • 1 red onion, chopped
  • 2 cloves garlic, minced
  • 1-inch piece fresh ginger, peeled and minced
  • 2 fresh hot peppers, seeded and minced (or to taste)
  • 1 cup broth
  • ½ teaspoon salt
  • ¼ teaspoon
  • black pepper
  • ½ teaspoon cardamom
  1. Tear stems from collard greens, and wash greens well.
  2. In a large skillet or stir fry pan, melt the niter kebbeh (or oil). Add onion, garlic, ginger and hot peppers and simmer, stirring occasionally, about 5 minutes.
  3. Add collard greens, broth, salt, pepper and cardamom. Bring to a simmer and cook until most of water has evaporated from pan and the greens are very tender (this took me about 1/2 hour… leave some time!).

Mesir Wat (spicy red lentils)

This is my absolute favourite dish in the platter. The lentils are soft and spicy and creamy. The berbere spice is really hard to describe in this dish, as it adds not only spice but a really well-rounded warmth and flavour. This recipe makes a LOT of food, and could be halved (especially if made alongside the other two recipes here). I made the full recipe, and have quite a lot left over… but I’m fine with that. Did I mention this is my favourite? I may try freezing some to see how it holds up.

Serves 4 to 6 – modified from this recipe

Ingredients:

  • 2 onions, chopped
  • 1 cloves of garlic, crushed or finely minced
  • 2 tsp ginger, peeled and minced or grated
  • 2-3 tbsp Niter Kibbeh (or oil or butter)
  • 3 tablespoons berbere
  • 2 cups red lentils, rinsed
  • 4 cups, water or broth
  • salt & pepper, to taste

Method

  1. Place the onion, garlic and ginger in a food processor or blender and puree. Add a little water if necessary.
  2. Heat the oil, butter or niter kibbeh in a large, heavy-bottomed saucepan over medium flame. Add berbere and stir rapidly to color the oil and cook spices through, about 30 seconds.
  3. Add the onion puree and sauté until the excess moisture evaporates and the onion loses its raw aroma, about 5-10 minutes. Do not burn.
  4. Add lentils and water to the saucepan. Bring to a boil, reduce heat to low, and simmer, uncovered, until lentils are cooked through and fall apart, about 30 to 40 minutes. Add water if necessary to keep the lentils from drying out.
  5. Stir in salt and pepper to taste and serve.

Mesir Allecha (mild lentils)

These lentils are mild and buttery. Although not the most stand out dish of the bunch, for me it offers a mild balance with the other dishes. I chose this dish to round out my platter. This recipe makes a conservative amount – which was fine with me, because I eat less of this one than the other two. Notice that the recipe calls for half the amount of lentils required in the Mesir Wat above.

modified from this recipe

Ingredients:

  • 1/3 cup onion, chopped
  • 2 garlic cloves finely minced or pressed
  • 1 tablespoon niter kebbeh
  • 1 cup red lentils (masoor dal), picked over, rinsed and drained
  • 1/2 teaspoon turmeric
  • 1/2 teaspoon salt
  • 3 teaspoons seeded and finely chopped jalapeño peppers
  • 4 cups water (adjusted as necessary)
  1. In a medium saucepan, soak red lentils for one hour in three cups of the water.
  2. Bring the lentils and water to boil and cook for 30 minutes until the lentils are soft, adding more water if necessary. Drain off any extra water and mash.
  3. Heat the niter kebbeh in another pan over moderate heat. Add the onion and garlic and cook for 3 minutes. Add the mashed lentils, turmeric, salt and hot pepper. Stir well.
  4. Add the remaining cup of water (or less, pour slowly) and cook for 3-4 more minutes more to reduce the mixture to a thick, well spiced puree.

From the Spice Drawer: Berbere and Awaze

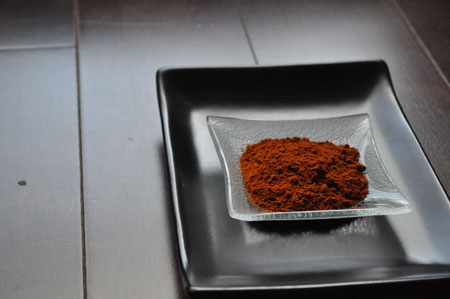
Berbere is a staple spice blend in Ethiopian cuisine. Made up of a number of spices that are roasted and ground, the primary components seem to be fenugreek seeds, cayenne pepper and paprika. The ratio of cayenne to paprika control just how hot the berbere becomes.

Sometimes written as ber-beri (which gives you an idea of how to pronounce it, almost like ‘Burberry’), it imparts a warm red colour to any dish that uses it as the primary seasoning.

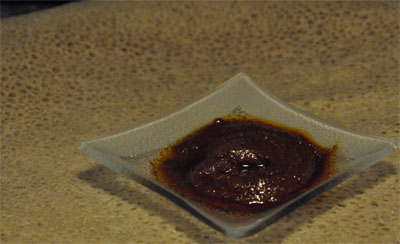
Berbere is also used to make a strongly flavoured condiment, called Awaze. A mix of berbere, garlic and wine, it is a deep, dark, spicy paste that can be used for dipping. This condiment is one of my favourite additions to my Ethiopian platter, adding an extra kick in combination with the injera (bread) and stews.

Watch for the Friday post for details of my attempt at making an Ethiopian platter! Sooo good!

Awaze

Awaze Paste

original recipe can be found here

Ingredients:

  • 1 cup berbere (mild red chili pepper spice blend)
  • 1 tsp mitmita (hot chili pepper spice blend) *optional, only if you want it to be REALLY spicy
  • 2 tablespoons olive oil
  • ¼ teaspoon garlic powder
  • ¼ cup dry red wine or dry sherry or Tej (Ethiopian honey wine)
  • ½ cup water
  • 1 tablespoon fresh lemon juice
  • ½ tablespoon fresh ginger juice
  • ¼ teaspoon black pepper
  • Salt to taste

Preparation:

  1. In small bowl, mix the berbere, mitmita (if included), garlic powder, black pepper.
  2. Add wine (or sherry or tej), oil, lemon juice, ginger juice, water, salt to taste; whisk it well.
  3. Keep in the fridge; serve it cold.

Food Waste Reduction Challenge 2010: Week 3

Food Waste Reduction Challenge - February 2010

Week 3 is done!!

Week 3 was clouded by my cold, but I still managed to cook a bunch. Not much tossing of food happened here… mostly shoveling.

We’re now in the home stretch, and I think this has been a great test. I’ll post the wrap-up for the month next week in my Monthly Mélange!

This week’s wins:

  • Gooooooaaaaaal!!! I finally started a freezer bag of veggie ends for making broth – and then I used it up to make broth! Didn’t take me long, and that’s just fine, because it’s better to use it up!
  • I also managed to use up one of the four types of squash I had in the freezer.

This week’s casualties:

  • A sadly rotten jalapeno. All of the other jalapenos were fine… but one decided to depart early.

I Love a Man with Mussels

This is a post about love, romance, and eating weird little creepy things out of their shells.

Some people have a hate-on for Valentine’s Day, and I used to be one of those people. I’ve eased up a little since then, realizing that every holiday (like every other day) is what you make of it. I choose to make it all about food. Surprise!

This past year, we’ve been opting for less fancy meals out for some of these ‘romantic evenings’, and have often ended up at our new favourite place to get mussels, The Fat Belgian. It’s cute, and not at all pretentious, with a great selection of beer (Erdinger and Fruli Strawberry on tap, woo!) and mussels. I’ll admit that I haven’t actually tried any of their other food, because we ALWAYS get mussels, frites and beer… and the odd dessert.

Moules

Lots of yummy mussels, in a broth filled with gruyere, walnuts and leeks.

To top it off, we almost always get the same friendly waitress, who shares my name and alma mater but only knew me as ‘purple hair’ until our last visit (unfortunately, she no longer works there, so we didn’t get her this time). The view from the second floor is unfortunate, looking out to a bright green tire place on one side and a boob/owl-themed stinkbar on the other. I won’t hold it against them – they can’t choose their neighbours.

Mussels are a very strange thing. Unlike some other seafood, mussels are often paired with very flavourful things, at least partly because the mussel meat has a stronger flavour that can handle other strong flavours. Most of the time, you will find mussels steamed with very flavourful broth, often including some kind of alcohol, and only a scattering of thinly sliced veggies (if any at all). This is best paired with some fresh frites and/or artisan bread (like sourdough).

We had a great Valentine’s meal.

I took the plunge last year, and finally tried making them myself. It was as easy as friends had reported, and now I’m trying to make a chart o’ fun. Basically, I have some of the basics down and am coming up with a few variations on the basic steamed mussel dish. My recipe/chart o’fun will be featured in an upcoming post!!

Crêpes d’Amour

Crêpes. They’re the kind of dessert that you can pretend are a meal. At least, that’s how I do it.

My valentine breakfast included some of these buttery, pliable treats filled with homemade crème pâtissière and raspberry rhubarb sauce. They were sweet, sour, creamy and delicious.

Empty Plate

They were so good that I forgot to take a picture.

I swore to take a picture of round 2, later on.

Crêpes

3 Dessert Crêpes

Round 2 crêpes were filled with three different fillings: my usual favourite, nutella and banana; nutella and cream cheese (tastes like a cheese cake!) and the rest of the custard and rhubarb sauce from breakfast. Sooooo good!!

This time, I used a crêpe recipe from the Martha Stewart site. Next time, I’m going to try one from Vegetarian Times as a comparison. The main difference between the two is the number of eggs (three) and inclusion of butter in the Martha batter. The VT version only contains one egg, which should affect both the texture and flavour.

I’m also going to have to try savoury crepes, or galettes, using buckwheat flour. These could be filled with just about anything, cheeses, pesto, spinach, mushrooms, peppers. Yup, still lots of fun to be had!!

Recipes (from the Martha Stewart website):

Food Waste Reduction Challenge 2010: Week 2

Food Waste Reduction Challenge - February 2010

Week 2 is done!!

So far, not bad. I only bought items that we needed for the week, and we’re doing a great job of using them up. I didn’t actually make my goal for the week – to start a freezer bag of veggie ends to use in the making of a broth. Boo! I really didn’t have many ends of things in the dishes I made… so no real need for it yet.

Goal #2: Make some room in the crowded freezer by using stuff up!! I already started with some rhubarb that I got from my mother-in-law’s garden, then froze. I’m also trying to think of something yummy to do with the ends of artisan bread (any good recipes, guys?). Those guys are taking up way too much space in my freezer!!

This week’s wins:

  • Bag o’ frozen rhubarb – I’ve had this for around 2 years, and was worried it would taste like death freezer burn. It was just fine! So I used it to make a nice sauce for my crêpes. I did end up putting two portions of sauce back into the freezer, but these are two really narrow freezer bags that take up MUCH less space than the big bag of frozen rhubarb.
  • Remembered to use up the tomato paste – you know how sometimes you only need a spoonful, and then you put the rest in the fridge and you find it a couple of weeks later growing its own ecosystem? We nicely avoided this by using the rest in a pizza sauce.
  • The rest of a lonely mozzarella ball was also put to good use on the pizza. We prefer stronger cheeses, so sometimes its hard for us to use up mozzarella before it turns into a bouncy ball. Another good use of leftover mozzarella is in a cheesy broccoli soup.

This week’s casualties:

  • A wee bit of what was once an edible rind from a soft cheese that was incredibly ripe (the rind gets really bitter when it’s overripe… so I had to sacrifice it). The middle was still tasty, though.
  • Some once delicious MIL-made strawberry jam that has seen better days. These things hide in the dark corners of our fridge, until one day we dig them up and wonder how they stayed there so long. I’m not sure how this one moved here with us… and now it comes back to haunt me in a month where I’m trying not to throw out food.

Challenges

The thing about challenges is that they are, well, challenging.

Part of the reason I started this blog is to challenge myself to try new things, learn some new dishes and have fun. I was told about a site called the Daring Kitchen, where challenges are issued each month and members are required to follow the same recipe (with few alterations permitted). This was just the kick start I needed, so I signed up for an account. I won’t actually hear back about starting the challenges for a couple of weeks, however.

I decided to try one of their prior challenges to get warmed up, jumping right into an area that I have never tried before – pastry. I started with the recipe for Salmon en Croute.

20100206_SalmonCroute_0015

Salmon en Croute – fresh out of the oven!

I’m not really much of a baker, so I enlisted the help of my husband, who helped by making the short crust and rolling it out. Neither of us have worked with pastry crusts before, so we found it to be pretty tricky to work with. It did not turn out exactly as described in the recipe, or the helpful video tutorials. After much work, and a little creativity, we managed to wrap the salmon in the pastry dough and get it into the oven.

Imperfect, yes, but still a success! It was a fun learning experience, and it tasted great!

Complete! Salmon en croute for dinner.

Complete! Salmon en croute for dinner.

Squid!

Squid may be a little scary, but it’s one of the simplest, tastiest and least expensive seafood options out there.

On our recent trip to St. Lawrence Market, we picked up some nice cleaned squid and made a simple, but delicious meal.

20100130_StLawrenceMkt_32-squid

Market Squids!

For those of you who are not fans of squid, or like to pretend that they don’t have tentacles, you may want to skip the next couple of paragraphs. I’m about to discuss “squid parts”.

Cleaned squid is really a great thing, for those of us that are not fond of guts. Many moons ago, I picked up a box of frozen mini squid from Chinatown, and quickly found out that they were not just nice clean white tubes, ready for cooking! After thawing, I had to do some gross things like pulling off heads, pulling out guts, and dealing with ink. Squids have a couple of places that contain ink sacs – one is in the tube part, and the other is around the single staring eye. The preparing of these squids was kinda gross, lots of work… and, in the end, the squids just weren’t that good.

I did not prepare squid on my own again until recently when I discovered the glory that is cleaned squid!! For the most part, the icky work is done for you – guts and ink sacs are removed (sweet!), along with the creepy eye. The plastic spine may or may not be completely gone, and the first time I got these there were still beaks in the head (did you know squids have beaks!??!) Also, you have to pull off the heads and deal with tentacles. This is really not a big deal. I even pulled off the beaks with no trouble. Other than that, all you really need to do is rinse them off and prepare them for cooking!

This time around, we opted to prepare the squids with tubes intact (not cut into rings) using our grill pan.
20100130_Stephfood_0005-squdfry

We found that it fit four small squids just perfectly.

Squid has a very delicate flavour, and a texture that can range from perfectly chewy to rough rubber-bandy; so you will need to handle with care.

20100130_Stephfood_0009-squidfry

For seasoning, I keep it basic: garlic, wine, butter, lemon and a light dusting of herbs & spices (dill & cayenne, usually). You want to be careful not to over cook the squid, otherwise you end up with the rubber bands. I found that the grill pan was perfect for this.

Combined with some veggies, baked sweet potatoes and a healthy glass of wine, it was the perfect meal!

20100130_Stephfood_0015-squiddinner

Our Dinner… still working on my presentation skills. 🙂