I Am Slowly Going Crazy, 123456 Switch! (Slow-Cooker Bolognese)

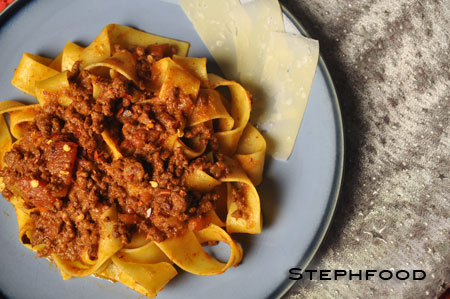
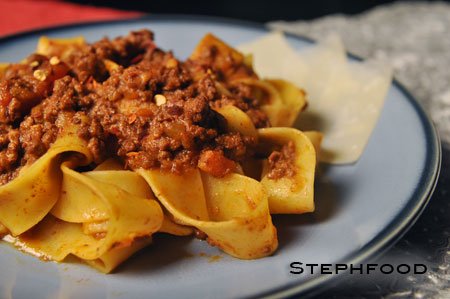
Slow-Cooker Bolognese

If the first week is any indication, 2013 will be the year of the slow-cooker.

Yes, I just got a slow-cooker for Xmas. I have used it nearly every day since I’ve been home (and, when you take leftovers into consideration, have likely eaten slowly cooked food every single day).

It’s a totally different way of cooking, and not quite in the way I expected. I’m going to have to get used to my new little friend, and figure out the quirks.

I haven’t quite figured out how to cook dried beans in the slow-cooker. I’ve tried a few times, and only once have the beans come out perfectly tender. Some reading has led me to believe that it might be the inclusion of something acidic (in this case, tomatoes) that prevents the beans from softening properly. I’m going to test this theory, and see what happens.

I’ve come to appreciate flipping my day, getting all of the dinner prep and cleanup out of the way early, so we can just enjoy dinner at dinnertime. This is a luxury that comes with vacation (or weekend), so I’ll see whether I can translate it to the weekday.

Expect more slow-cooker recipes from me in 2013! I’ll be sure to let you know about my failures, and what I did to make it work in the end.

Slow-Cooker Bolognese

My first slow-cooker recipe is not really a work day dish, as it takes quite a bit of prep and makes a lot of dishes. I’ve never made a bolognese sauce before – in fact, I don’t remember ever buying ground beef before – and thought it would be a nice warming dish on a cold day. Enjoy!

Slow-Cooker Bolognese Sauce

Source: this recipe, adapted for the slow-cooker.

4-6 servings

Ingredients:

  • 2 Tablespoons extra-virgin olive oil
  • 1 1/2 cups finely chopped onion
  • 1 cup finely chopped celery stalks
  • 1 cup finely chopped, peeled carrot
  • 3 oz. thinly sliced pancetta, finely chopped (full disclosure: I used regular strip bacon here)
  • 1 – 2 lbs. lean ground beef
  • Kosher salt and freshly ground black pepper
  • 1/2 cup dry red wine
  • 1 cup whole milk
  • 5 Tablespoons tomato paste
  • 2 cups beef or chicken stock, divided
  • 250g tagliatelle or fettuccine
  • grated Parmigiano-Reggiano (for serving)

Preparation:

  1. Heat the olive oil in a heavy pot over medium-high heat. Add the onion, celery, and carrot and cook until the onion is translucent and all the vegetables have softened.
  2. Add the pancetta, and sauté for a few minutes to release some of the fat into the onion mixture.
  3. Add the beef, breaking it apart with your spoon and cooking until it is just browned. Season with salt, and pepper.
  4. Add the wine to deglaze the pan, scraping up the bits that are stuck to the pan and mixing them in. Stir in the milk and simmer until the milk has reduced completely and very little liquid remains, about 10 minutes.
  5. Stir in the tomato paste, and allow to cook for a few more minutes.
  6. Transfer the mixture to the slow cooker. Add the cup of canned tomatoes and 2 cups of the stock. Cover and cook on HIGH for 6 hours or LOW for 8 hours.
  7. In the last half hour of cooking, remove the lid to allow any excess liquid to evaporate and reduce the sauce to a thick gravy consistency.
  8. Gently toss sauce with al dente cooked pasta, top with parmesan and serve. I also added peperoncini flakes – and it was great!
Grilled Eggplant and Haloumi Stacks

Grilled Eggplant and Haloumi Stacks

This summer was full of grilling, fresh veggies and fresh herbs. One of my favourite dishes made good use of a grillable style of cheese called Haloumi, which holds its shape during grilling and even ends up with adorable grill marks!

Grilling makes everything better. I’m pretty convinced that this is true, and so far I haven’t been challenged on it. Eggplant is one of the easiest things to grill up – it gets tender inside, and full of flavour. I was inspired by the caprese salad stacks I often make in the summer, and decided to come up with a grilled version that featured eggplant.

My introduction to Haloumi made the cheese selection simple. It was a revelation! The cheese melts just a little, and even gets the grill marks, but it doesn’t start to get oozy. You just put it straight on the grill and watch the magic happen. I tried a few different brands that were all delicious, but my favourite came from nearby Upper Canada Cheese Company. Their Guernsey Girl grillable cheese is delicious and salty, and just a little squeaky.

Grilled Eggplant and Haloumi Stacks

made with Grilled Guernsey Girl cheese from Upper Canada Cheese Company

While the cheese and the eggplant are amazing on their own, I felt they needed something to pull the dish together. I made a topping with diced tomatoes mixed with fresh chopped basil. It’s important to make this a couple of hours before you want to eat, to give the mixture some time to be totally infused with basil.

I made this dish at least a dozen times this summer, and as a result ate waay too much cheese for my own good.  Yay!


Grilled Eggplant and Haloumi Stacks

It’s best to choose an eggplant that is longer, rather than wider, with a fairly consistent diameter. This ensures your stacks are roughly the same size.

Ingredients:

  • 4-6 tomatoes, seeded and chopped
  • 1 small bunch of basil, chopped
  • pinch of sea salt
  • freshly ground pepper
  • 1 eggplant, 2 pounds, sliced into 1-inch rounds
  • 1-2 tablespoons olive oil
  • 500g haloumi cheese, or another grillable cheese, sliced 1/2 inch thick

Preparation:

  1. Mix the tomatoes with the basil, salt and pepper in a medium-sized bowl. Set aside. If your tomatoes are too watery (even after seeding), you may need to strain this mixture later on to remove the liquid.
  2. *Lightly* brush both sides of the eggplant slices with olive oil while the grill is preheating.
  3. Grill the eggplant rounds until tender, and grill the haloumi slices until softened and lightly browned on the outside. The haloumi will not melt entirely.
  4. Stack the ingredients as follows: eggplant round, haloumi slice, a teaspoon of the tomato mixture.

Daring Brining and Roasting

Brine & Roast Chicken

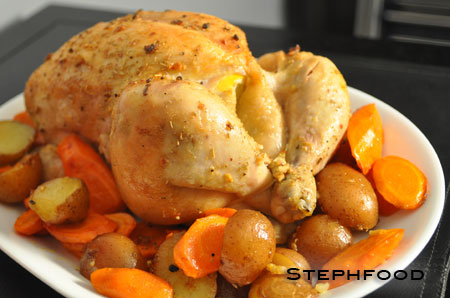
I have the most shocking thing to confess – I roasted a whole chicken… and I liked it.

OK, so most people have roasted a whole chicken at some point in their lives. Not me. I had never cooked chicken that had skin on it, or bones. Being a vegetarian for many years will do that to you. I just don’t have the usual meat-making skills that other people have. I figure it’s time to change that. Even if I don’t regularly make roasts or brine chickens, it’s worth learning these techniques just to know that I can do it.

Brine & Roast Chicken - raw

I think he’s a little cold…

The hardest part was finding a container big enough for the brining. Seriously, I couldn’t find anything that would allow me to fully submerge the chicken in liquid that also fit in my fridge. I made it work, and managed to brine the chicken, and let it air dry overnight.

The roasting was the most fun part, of course. I found a recipe with a simple rub and shoved a couple of lemons up its cavity. All in a day’s work, my friends.

Brine & Roast Chicken

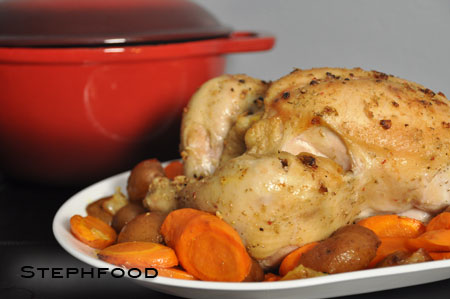
Finished product – tasty and economical!

I think I did a pretty good job for my first chicken roasting. I came to realize just how economical it is to make a whole chicken. This very inexpensive bird made us a very filling meal that night (ughh… I think we ate more of the meat than we needed to) and the leftovers were plenty for a chili I made a couple of days later. I also made chicken stock with the carcass (sorry, Mess, but that’s what it’s called). So tasty and useful!

This was a great experience, and no doubt I will be doing it again soon!

Audax of Audax Artifax was our November 2012 Daring Cooks’ host. Audax has brought us into the world of brining and roasting, where we brined meat and vegetables and roasted them afterwards for a delicious meal!

Roast Chicken with Lemon, Garlic and Rosemary

Source: this recipe

1 cooked chicken

Ingredients:

  • 3 cloves garlic, minced
  • 1/4 cup vegetable oil
  • 1 teaspoon dry mustard
  • 1 teaspoon dried rosemary, crumbled
  • 1 teaspoon each salt and pepper
  • 6 mini potatoes, halved
  • 3 large carrots, chopped diagonally
  • 1 large onion, peeled and cut into wedges
  • 1 whole chicken
  • 1 lemon, halved
  • 1/4 cup (60 mL) all-purpose flour
  • 1-1/2 cups (375 mL) chicken stock
  • brining ingredients (recipe below)

Preparation:

  1. Brine chicken for at least 6 hours, and air dry overnight.
  2. Preheat oven to 425°F.
  3. Combine garlic with 2 tablespoons of the oil, mustard, rosemary and half each of the salt and pepper.
  4. Toss vegetables (carrots, onion and potatoes) with oil, salt and pepper. Layer on the bottom of the roasting pan.
  5. Remove giblets and neck from chicken. Pat chicken dry inside and out. Place lemons in cavity. Tie legs together with string; tuck wings under back. Place, breast side up, on rack in large roasting pan. If you don’t have a rack, make sure the chicken is on top of a layer of vegetables.
  6. Brush mustard mixture all over chicken. Roast for 15 minutes.
  7. Lower the heat to 375°F and roast for a further 12-15 minutes per 450 grams/pound. The internal temperature should be 165°F, or the juices should run clear when you pierce the bird between the leg and thigh.
  8. Rest for approximately 30 minutes covered loosely in foil.

All-Purpose Brine

Ingredients:

  • 4 cups (1 litre) of cold water
  • ¼ cup (70 gm) table salt or ½ cup (70 gm) Diamond Crystal Kosher Salt
  • optional 2 tablespoons (30 ml) (30 gm/1 oz) sugar
  • optional 3-4 peppercorns, a few springs of herbs, a garlic clove or two, a knob of ginger etc.

Preparation:

  1. Bring 1 cup of water to the boil. Stir in the salt, sugar and other seasonings (if using) until salt and sugar completely dissolve.
  2. Place in a non-reactive container (glass, plastic, stainless steel, zip-lock bags etc). Add the remaining water and stir. Allow the brine to cool until it comes down to room temperature.
  3. Add your cut of meat make sure that the meat is completely submerged (that is totally covered in the salty water) if need be you can weigh down the cut of meat with a clean plate (etc). If using plastic bags make sure that the meat is totally covered in brine and make sure that is bag is locked securely.
  4. Cover the container with plastic wrap to prevent odours contaminating the flavour brine or the brine leaking.
  5. Place the container into the refrigerator for the soaking time suggested by the guidelines above.
  6. If desired you can air-dry your poultry (usually over night) in the refrigerator if you wish to have crispy skin on your bird. It is best to pat dry your brined item (inside and out) with paper towels before cooking.
  7. Cook the brined item as directed by the roasting guidelines above.

The Bizarre Tale of Beany Brownies

Beany Brownies

I am now on the hunt for gluten-free recipes, and this is one of the first ones I chose. The clincher for me is the secret ingredient… black turtle beans. Not your usual brownie ingredient.

I love black turtle beans. I love them so much that I could probably snack on them. When I saw a brownie recipe that was mostly made up of black beans, I couldn’t imagine they would be good! I couldn’t get them out of my head, so I decided to make up a batch for Hallowe’en. It’s a simple recipe, so I really had nothing to lose.

Don’t kid yourself – these aren’t fat-free. I think the awesome power of black beans overpowers the butter and eggs, though. BAM! Superhero “brownies”!

Beany Brownies

Rich in beanly goodness

The Verdict:

Would you mistake these for regular brownies? Hells no! Are they tasty? Yes! Am I at least a little bit biased by my love of black beans? Yeah, I think so. J thought these were great, too, so you have a second opinion on the matter.


Beany Brownies

Source: this recipe

about 12 muffin-sized portions

Ingredients:

  • 1 can (15 ounces) no-salt-added black beans, drained and rinsed
  • 3 large eggs
  • 1/3 cup melted butter, more for the baking dish
  • 1/4 cup cocoa powder
  • 1/8 teaspoon teaspoon salt
  • 2 teaspoons gluten-free vanilla extract
  • 1/2 cup cane sugar
  • 1/2 cup gluten-free semi-sweet chocolate chips
  • 1/3 cup finely chopped walnuts

Preparation:

  1. Preheat oven to 350°F. Lightly grease 12 silicone muffin liners and place in a muffin tin, or on a baking sheet with a lip.
  2. In a food processor, blend the black beans, eggs, melted butter, cocoa powder, salt, vanilla extract and sugar. Allow the mixture to sit for a couple of minutes, to allow it to thicken.
  3. Stir in the chocolate chips and walnuts.
  4. Scoop out the mixture into each of the muffin liners, filling about 2/3 of the way, and top with a few more chocolate chips.
  5. Bake for 30 to 35 minutes, or until just set in the center. Allow to cool completely before eating.

Moroccan Eggplant Zaalouk

Moroccan Zaalouk (Eggplant dip)

When in Morocco, we had this fantastic eggplant dip that was quite different from the babaghanoush that we’re used to. Although cold, it was more similar to a hot dish that I enjoy in Indian cuisine… so I thought I would turn it into a hot dish! Perfect for the cool fall weather…

I’ve taken a pretty long break from the blog, covering my busiest time of year at work (where did September go?) and a much needed vacation (where did October go?). During that time, cooking was either a chore or not an option. Thankfully, this has changed.

After a trip to Spain, Morocco and Portugal, I am inspired to cook many new things.

Travel inspires me to cook, for two main reasons. First, the obvious – I get inspired by things I’m eating and smelling, and it gives me the opportunity to explore the culture further after the trip has ended. The second reason I get inspired to cook is, unfortunately, bad touristy food and a lack of vegetables. Whatever the reason, I’m happy to be inspired to cook and blog!

Fes - Riad Dinner

The riad in Fes: Don’t you just want to curl up with a glass of wine and some appetizers?

Back to the Moroccan dip that inspired this post… We were brought to a guest house in the medina in Fes – a mind-boggling maze of a place. The setting was incredible and elaborate, and we were seated on the terrace, with a view of the city. The meal started with a series of cooked dips, which were lovely. I probably could have eaten a whole meal consisting only of dips. The eggplant dip was a highlight for me – cleaner tasting than babaghanoush (no creamy tahini here), and closer to Indian baingan bharta in texture.

I had a thought – what if I served this dish hot?

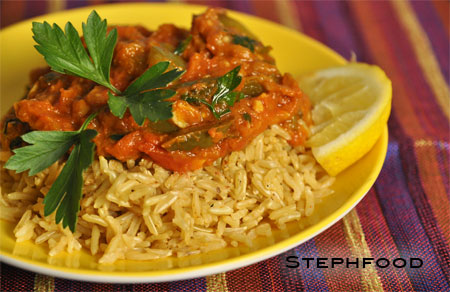
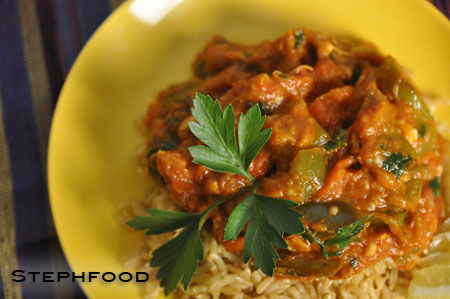
To make it more of a meal, I have added some green bell pepper and served it on top of rice. It could also be served with crusty bread instead of rice.

This is a really easy dish – and you could even roast the eggplant and tomatoes in advance and cook the dish the next day to save time and make a weeknight-friendly meal. One thing I should note – I didn’t get a big enough eggplant, so it turned out a little more tomatoey than it should have. It still tasted amazing, but I recognize that the dip we had in Fes did not have such a strong tomato flavour.

You can also be flexible with the seasoning, if you like it a little bit spicier or want to add in some Ras el Hanout.

Cold, this is a great dip to bring to a party. Hot, it’s a simple dinner option.

Moroccan Zaalouk (Eggplant dip)

Delicious hot or cold!

Moroccan Eggplant Zaalouk

Based on this recipe. This can be served hot or cold. Traditionally, it is served cold (as a dip), but it made a great hot meal with the addition of green bell pepper and served with bread or rice.

4 servings

Ingredients:

  • 1 eggplant, 2 pounds, halved lengthwise
  • 4 large tomatoes, halved lengthwise
  • 1/4 cup olive oil
  • 1 green bell pepper, chopped (optional – if making dinner, as opposed to a dip)
  • 3 cloves of garlic, finely minced
  • 1 tablespoon paprika
  • 1 tablespoon cumin
  • 1 1/2 teaspoons salt
  • 1/8 teaspoon cayenne pepper (optional)
  • 1/3 cup water
  • 1/3 cup chopped fresh cilantro and parsley, mixed
  • juice from 1/2 lemon

Preparation:

  1. Place eggplant and tomatoes skin-side up, on an oiled roasting pan. Pierce the skins with the tines of a fork. Sprinkle a bit of olive oil on top of the eggplant and tomatoes. Roast in the oven, on the top rack, under the broiler until the skin is a little bit charred, and and the meat is very tender (it took about 10 minutes for me).
  2. While the vegetables are roasting – if you will be serving this as a hot meal – lightly sauté the bell pepper in a little bit of oil. Remove from heat, and set aside.
  3. Scoop out the roasted eggplant from the skin, and peel the skins off of the tomatoes. Mash the eggplant and tomato together. Set aside.
  4. In a deep sauté pan, heat the remainder of the olive oil over medium-high heat. Add the eggplant and tomato mixture, and stir. Add the remaining ingredients, except for the lemon. Mix well, cover and cook for about 20 minutes, until the mixture is very thick and most of the liquid has been cooked off. Do not let the mixture burn – turn down the heat, if necessary.
  5. Add the green bell peppers and half of the cilantro/parsley to the mixture and heat through.
  6. Add the lemon juice and the rest of the cilantro/parsley.
  7. Serve warm or cold with crusty bread, or on top of rice.

Kitchener and St. Jacob’s Markets – Part 2: To market, to market

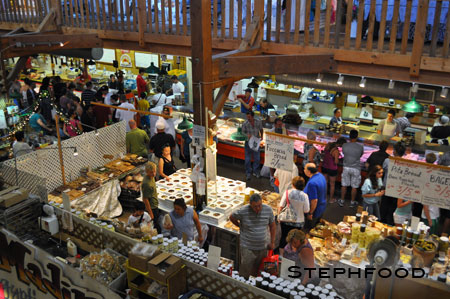
St. Jacob's Farmers' Market

St. Jacob’s Farmers’ Market

With a long weekend coming up, we decided to plan a low-key trip someplace close. Our trip ended up being an odd blend of childhood memories and grown up relaxation.

We decided to check out the Kitchener Market, which I haven’t been to in about 20 years. To be totally honest, I thought that it and the St. Jacob’s Farmers’ Market were the same thing for a long time. St. Jacob’s seems to be the market that more tourists flock to, and it came highly recommended, so I thought it was time I went.

We managed to fit both markets in a single Saturday.

St. Jacob's - Pickles

Pickle on a stick!

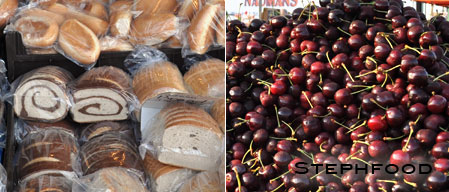
St. Jacob’s is a very large and very busy market, with much more than just food stalls. To be honest, we ignored most of the other wares. That part kinda felt like going to The Ex; not really what we were looking for. Here, you can get large quantities of things like peppers or tomatoes for a ridiculously cheap price – unlike some of the Toronto markets. Clearly, they expect more canners at the St. Jacob’s market than at St. Lawrence. I was happy to see a variety of summer sausages, apple butter and baked goods.

Then we moved on to Kitchener.

Kitchener Market: Saturday Stalls

Kitchener Market: Saturday Stalls (Yeah, I reused this photo – honeybadger don’t care!)

It was strange being at the Kitchener Market again, after so much time had passed. From what I understand, it’s actually in a different building than the one I went to as a kid, and it looks and feels very different. In fact, I thought that the St. Jacob’s market building brought back more childhood memories – even though I had never been there before! This is why I chose a photo of me at the St. Jacob’s market in my last post about going to Kitchener as a child. It felt right.

That said, I can’t say I was disappointed. We found nearly everything we wanted between the two markets. I’m always amazed at how different each market feels. They may have much of the same produce, and even some of the same vendors, but there is a different vibe in each market you go to; my attention is drawn to different things.

Time for me to go on a bit of a summer hiatus! I’ll be back in the Fall when I run out of recipe ideas :)

Kitchener and St. Jacob’s Markets – Part 1: A blast from my past

St. Jacob's Market - Steph

I remember waking up while it was still dark out, and being bundled up in the back of a van to go to “the market”.

My Opi (a colloquialism based on the German word for Grandpa, Opa) and Mr. Little would be in the front, sometimes talking but most often quiet. I would have a goodie bag in my clutches, full of treats (ahem – SUGAR) to keep me alive for the trip.

We were on our way to the Kitchener Farmers’ Market.

Thinking back on it now, I have no idea why a market like that would have appealed to me. Moreso, I have no idea why Opi would have wanted to bring a hyperactive little girl to a farmers’ market in a city a couple of hours away. It turned out to be one of my favourite things, and is still one of my fondest childhood memories.

If there is one thing that I have inherited from my Opi, it is a love of cured meats and strong cheeses. For years, I ate vegetarian, and when I first chose to eat cured meats again (on a trip to Germany, no less), I was reminded of him. That’s another story entirely.

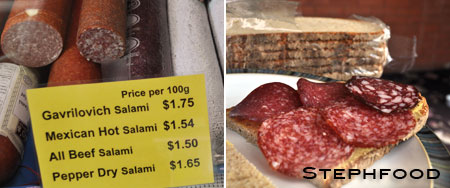
Kitchener Market Salami: before and after

Kitchener Market Salami: before and after

The market seemed like a different world to me, when compared to the shiny grocery stores we usually got our food from. I hated going to grocery stores. I loved going to the market. There were so many bizarre things to hold my attention – pigs’ heads, doll clothes, cheese, pickles, preserves and hand-crafted knickknacks. I’m sure there were also vegetables, but that wasn’t on my radar at the time. At one point, we walked through a door and found ourselves on a walkway above the livestock auction. This was not at all like anything I had seen at home.

I would usually sleep on the way home, exhausted from the day’s adventure.

Once home, we would dig in to some of the day’s haul. There would be delicately sliced cured meats, hearty sausages, pickled fish and stinky cheeses. It didn’t matter to me that I would come home smelling like dirty socks (see Limburger), but my Mom certainly wasn’t impressed.

It was something special that I shared with my Opi, a food ritual that brought us together.

Kitchener Market: Saturday Stalls

Kitchener Market: Saturday Stalls

Now, visiting markets is something I love to do with J. We get overwhelmed by the crowds, the strange organization of stalls, the vast quantities of produce, but there is always something to catch our attention. Each market is different, with different products and a different culture. This is my first time back to the Kitchener market, and my first time there without Opi.

To be continued…

(Note: the first photo is actually taken at St. Jacob’s Farmers’ Market… my choice of photo will make sense in the next post.)

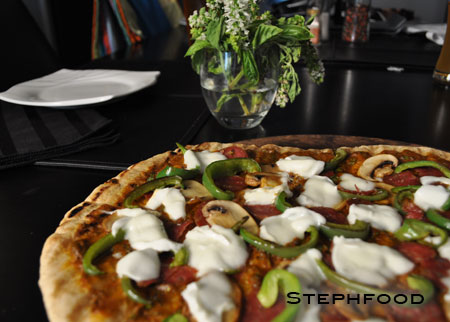
Grilled Pizza, a Revelation

Grilled Pizza

Pizza is one of the few things that I “let” J make for dinner. He’s a pro with the dough – something I have no patience for.

This post is a bit of a cheat because I didn’t do any of the tough work on this dish… I just helped. Also, this isn’t a recipe post. It’s more of a “results of our experiment” post. Hahahaha.

In any case, here it is:

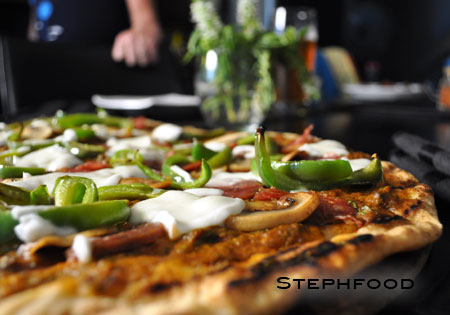
Grilled Pizza

On the grill!

For this experiment, we decided to stick to one of our usual combinations of sauce and toppings, just to keep it simple. J made his usual dough. For the sauce, I took full advantage of the wealth of fresh basil we have right now and made a lightly tomatoey basil sauce with lots of olive oil. For toppings, we used mushrooms, green peppers, thinly sliced smoked sausage and buffalo mozzarella.

A couple of tips that we collected from various sources and took to heart:

  • oil the grill well
  • cook your toppings first!

The second tip was the one that made lightbulbs go off for me. I had never heard it before, but it made total sense. On the BBQ (especially a little propane one, like ours), the bottom will cook before the top. Unless you want your crust to burn, you need to cook your veggies and other toppings that need to be cooked. I sautéed the mushrooms and green peppers to release the liquids, and J lightly pan fried the sausage slices to release some of the fat.

The dough goes on the BBQ first, to grill the bottom before any toppings or sauce go on. Once the bottom is cooked nicely, flip the dough and add the toppings to the cooked side. You want to cook it long enough to get a nice crust with grill marks, and to melt the cheese. Since the veggies were already cooked, we don’t have to worry about them!

Grilled Pizza

Ready to eat!

The Verdict

Seriously, J was over the moon. It was so delicious, and he was so proud of himself for finding a way to make pizza in the summer. We kicked ourselves for waiting this long to try it. Do it. You will not regret it!

The one thing that I want to improve for next time is a way to keep the pizza warm after it’s done cooking. We took it right off the grill, and it did cool off while we were eating. It wasn’t terrible, but I think we can do better. Maybe if we took it off the grill long enough to cut a couple of pieces and let the grill cool a little, we could return it to the grill to keep warm. Hm.

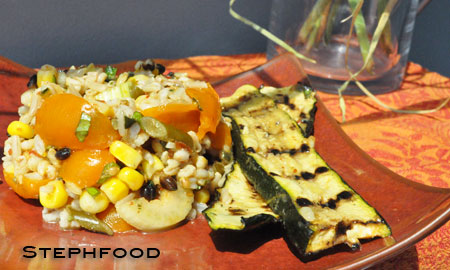
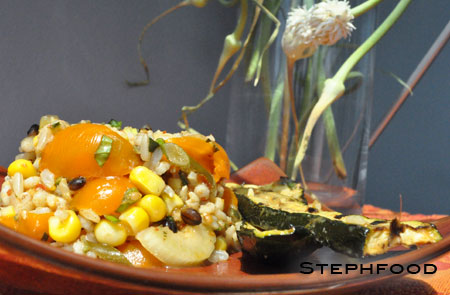
Barley Rice Salad

Barley Rice Salad

I love barley. In the winter, I’m always making stews that overflow with barley. Until now, however, I haven’t found something to use it in during the summer months. Here, I’ve used it in a salad with some rice and veggies. Cross that one off my list of grains to try saladifying!

I’m not sure why I love barley so much. It doesn’t have a big flavour, and isn’t as versatile as rice or quinoa. I like the little chew it gives to a dish. I guess it’s as simple as that.

It seems like I’m trying to find a way to make salad out of every grain in my cupboard. Grain salads are great for me, because they make great leftovers to bring to work. I’m always thinking of what to bring for lunch the next day. I do my best to limit the number of days I have to buy lunch, so that’s really important for me.

I’ve kept the dressing very simple lately. I just restocked my apple cider vinegar, which is fantastic for salad dressing. It’s tart and acidic and has more flavour than white vinegar, so you don’t need to add many other ingredients. One reason I kept things simple – fresh basil. Our rooftop garden is overflowing with delicious basil, and I’m happy to highlight it in the salad. Nothing compares to fresh basil.

Cooking tip: cook the barley in advance and freeze in portions. Do this on a day that isn’t too hot, so you’re ready to go when you need it. I didn’t do this with the rice, because rice is quicker to cook up when you need it.

Barley Rice Salad

Barley Rice Salad meets the Garlic Scape Monster

Barley Rice Salad

4-6 servings

Ingredients:

  • 1 cup brown or mixed rice, dry (I used a fun one from Bulk Barn called Black Pearl)
  • 1 – 1.5 cups pearl barley, cooked
  • 1 cup corn kernels, cooked (can use canned, frozen, grilled)
  • 1 tablespoon finely chopped green garlic (or 1/2 teaspoon finely minced garlic clove)
  • 1/2 – 1 cup sliced fennel
  • 10-12 cherry tomatoes, quartered (and drained, if using a waterier variety)
  • 2 tablespoons basil, chiffonade or finely minced
  • 3 tablespoons extra virgin olive oil
  • 1 tablespoon apple cider vinegar
  • 1/4 teaspoon ground yellow mustard seed
  • salt and fresh ground pepper, to taste
  • pinch of cayenne, or your favourite ground chile (optional)
  • 1 cup chopped cucumber

Preparation:

  1. Cook rice using your favourite method (stovetop, rice cooker, steamed, etc.). Remove from heat, transfer rice to a large nonreactive bowl, stir in barley and set aside to cool.
  2. Meanwhile, prepare and mix together the garlic, fennel, tomatoes and basil. Stir into rice and barley mix and put in the refrigerator.
  3. In a small glass with a pour spout, whisk together the oil, vinegar, mustard powder, salt, pepper and cayenne until the mixture emulsifies (it will come together and thicken slightly). Pour dressing over salad, bit by bit, and gently toss until well coated. You may not need to use it all.
  4. Top with chopped cucumber and serve.

Related posts:

  1. Tabbouleh (Bulgur Salad) Another in a line of fresh summer salads, Tabbouleh is…
  2. Quinoa and Asparagus Salad Time for summer salads! Last year, I basically gave up…
  3. Wheat Berry Salad with Harissa “Grillin’ and salad” season is in full swing. Over the…

Related posts brought to you by Yet Another Related Posts Plugin.

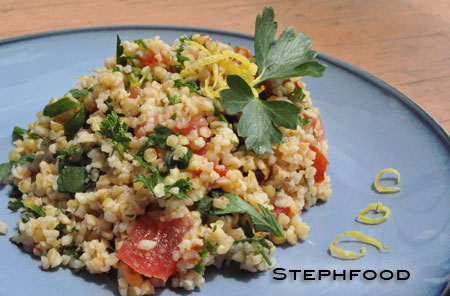
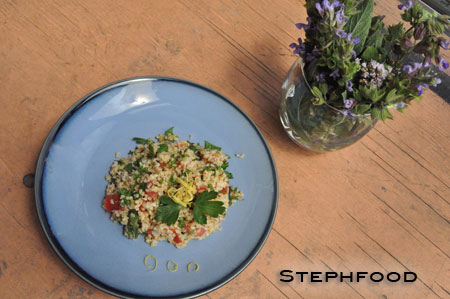
Tabbouleh (Bulgur Salad)

Tabbouleh (Bulgur Salad)

Another in a line of fresh summer salads, Tabbouleh is great if you have too much parsley on hand. I thought this would be a great way to stop the parsley from taking over the garden. Made up primarily of bulgur wheat, parsley and tomatoes, this Middle Eastern favourite provides a nice break from the usual green salad.

Like most salads, this one is pretty flexible. Do a quick Google search, and you’ll see some that look like they’re entirely made of parsley – mine is heavier on the bulgur. The main elements – bulgur, parsley, tomato and lemon juice – are the key constants. I usually buy a coarser bulgur, for making pilafs over the winter. Lucky for me, I had just enough fine bulgur stashed in the cupboard for this occasion.

I added some Aleppo and Maras pepper to give it a bit of kick. Aleppo is fruity, and not spicy, and the Maras is a little fruity and also a little spicy. So much fun!

One note about the tomatoes… You can use whatever you have on hand. This is a great way to use up bits of tomato left from making sandwiches. The one thing to pay attention to is the water content. If your tomatoes are watery, I recommend straining the liquid off before adding them to the salad. If you are using a drier tomato, like a Roma or a grape tomato, you probably don’t need to worry about it.

Tabbouleh (Bulgur Salad)

Tabbouleh (Bulgur Salad)

Tabbouleh (Middle Eastern Bulgur and Parsley Salad)

4-6 servings

Ingredients:

  • 1 c dried fine bulgur
  • 1 c packed finely minced parsley
  • 1/4 c minced mint
  • A sprig of dill (optional)
  • Salt and freshly ground pepper, to taste
  • 1/2 – 1/3 c chopped tomato (Roma and grape tomatoes work well)
  • Juice from 1 med lemon
  • 1/4 tsp Turkish Maras ground pepper (optional, could also use a pinch of cayenne)
  • 1/4 tsp Aleppo pepper (optional)

Preparation:

  1. Pour 2 cups of boiling water over bulgur, in a heat-safe bowl. Gently stir with a fork, then cover with a clean dish towel. Leave for 10 minutes. Most of the water will be absorbed, strain off any excess. Allow to cool.
  2. Stir in the remaining ingredients.
  3. Refrigerate for at least an hour. Can be served slightly chilled, or brought back to room temperature.

Related posts:

  1. Daring Vegetarian Köfte (lentil and bulgur patties) This month’s Daring Cooks’ challenge asked us to make some…
  2. Wheat Berry Salad with Harissa “Grillin’ and salad” season is in full swing. Over the…
  3. Quinoa and Asparagus Salad Time for summer salads! Last year, I basically gave up…

Related posts brought to you by Yet Another Related Posts Plugin.