Mussels Twofer

Tomato Gorgonzola Mussel Pasta

No, I haven’t gone mad and decided to eat mussels every day! This post is a TWOFER! This is going to be an ongoing series of posts that show how leftovers can be used to make a second great meal.

Today’s dish was made with the leftovers of my Tomato Gorgonzola Mussels that I posted about earlier this week. Of course, you don’t want to keep leftovers for too long – especially seafood – so I made this up the very next day.

I loved the combination of tomato and gorgonzola, so I decided to make it into more of a sauce. First, I strained the broth to take out any bits and silt that came out of the mussels. I reduced the broth quite a bit, added some tomato paste, onions, garlic, herbs and a touch of balsamic vinegar. I also added some sautéed quartered mushrooms, green peppers (actually, I used poblano peppers because I had them on hand) and more gorgonzola. I added the remaining mussels, and tossed with some whole wheat egg noodles (did you know they make those!! Soo good! I’ve never seen a whole wheat egg though…).

Yeah, so that’s pretty much it! No real recipe here… just a concept. This is a part of our ongoing goal to reduce waste in our home – try to only buy what I need, and use it all up!! It doesn’t have to be boring.

The Mussel Matrix

Tomato and Gorgonzola Mussels

I’ve been wanting to post my “Mussel Matrix” for a while, but needed to work through it at least once more.

Steamed mussels are so easy to make, and it’s easy to combine really bold flavours without it being too overpowering. I’ve been obsessed with mussels for the last couple of years, and we had finally found our favourite place in town… and now we find out that it closed.

I guess I’ll just have to make my own personal mussel restaurant.

When I was first looking into making mussels, I found that many of the simple steamed mussel recipes were pretty similar. Just swap out seasonings, veggies, liquids, and you get a totally different dish! Being a bit of a spreadsheet nerd, I thought it would be a good idea to make a matrix of ingredients that you could use with a simple recipe that could work every time.

So here it is!

Continue reading The Mussel Matrix

Anchovy Goddess – BB7

Anchovies

“That stench… that heavenly stench!”

Yes, today I am the Goddess of Anchovies! As a part of One Hot Stove’s Blog Bites 7 : The Iron Chef Edition, I put on the crown and try using anchovies in two different dishes. Again, I’m tying together the Blog Bites entry with my ongoing love of referring to other blogs, as seen in my earlier “Blog Love” posts.

It all started when I found a blog post with a recipe for Orecchiette with Broccoli and Mushrooms on What You Having for Your Tea, a blog I subscribed to recently. We weren’t eating much pasta at the time, and this dish looked really good and fast. There was just one wee bony ingredient that I was both unsure of and intrigued by – the anchovy.

Anchovy Orecchiette

I didn’t change the recipe much – I just tossed in a few halved grape tomatoes and garlic scapes. It was incredible, and the anchovy was subtle and really interesting. It’s one of those ingredients that seems a little weird, and you figure you can make the recipe without it… which you probably could, but you’d be missing out.

I made this dish twice, and really hoped that I could use it for an upcoming Blog Bites, since the whole point is to highlight recipes from other blogs.

As it happens, this blog bites requires that we choose an ingredient and use it in two different recipes. I added to my personal challenge by requiring that I find recipes on different blogs. In fact, I’m highlighting THREE blogs today, because I took inspiration from one blog and part of the recipe from another blog.

Let me explain.

In the last few weeks, I came across this blog post on Kalyn’s Kitchen, showing a stack of green zebra tomatoes and fresh mozzarella drizzled in Green Goddess dressing. At the time, I was more drawn to the zebra tomatoes, because I love them and hadn’t seen ANY this year (still haven’t).

Jump ahead about a week, and I decide to use anchovy as my BB7 ingredient. I do a quick search of some of the blogs I frequent, and I come across another, totally unrelated blog post highlighting Green Goddess dip, on Morsels & Musings.

Goddess Stack - naked

Taking the Green Goddess dip recipe and combining it with the inspiration to stack stuff and top it with the goodness of the Goddess, you have my second dish. I stacked grilled yellow and green zucchini, sliced tomatoes and a bit of bocconcini cheese and poured some Green Goddess sauce over the top.

So good!

Goddess Stack

The moral of the story is that anchovies aren’t only Fry’s favourite extinct pizza topping, they’re also a way to add a special zip to a sauce or a simple pasta dish. Weird, but nice!

My adaptation of the Green Goddess sauce after the jump.

Continue reading Anchovy Goddess – BB7

BBQ Lobster

BBQ Lobster -raw tails

We had never bought lobster before, but for some reason when we saw it at the grocery store, J decided he would BBQ it. Yes, we bought frozen lobster tails at the grocery store. Toronto isn’t known for it’s fresh seafood, so this is the best option for the average joe.

When we got home, J searched the internet to find proof that you could actually BBQ lobster tails. Of course you can – is there anything you can’t BBQ?

This isn’t exactly a recipe – mostly just a log of our experiment, for which I give full credit to the lovely and talented J. I didn’t have anything to do with it, aside from the adding of garlic to the butter that we used for dipping.

BBQ Lobster - on the grill

This isn’t a fancy schmancy lobster dinner. It was simple and rustic, with some BBQ potatoes and salad.

Buying lobster tails is a very different experience than having a whole lobster. I’ve only ever done that once, and while I enjoyed the experience I found most of it frustrating. After twisting the lobster apart, I spent much of the meal trying to prevent the inner goo from getting all over the rest of my food (are you hungry yet?). I think I also cut myself trying to pry bits of meat out of claws and whatnot.

The most satisfying part of the lobster is the tail. So that’s all we bought!

BBQ Lobster - cooked

Here are the grilled lobster tails, in all their glory. They were small, but delicious, and I’m sure we’ll be doing this again soon.

Next, we need to figure out how to cook them on the stove or in the oven.

Tomatoes in the Raw

Raw Tomato Sauce on Pasta

I’m still avoiding any extended cooking, but I realized I’ve missed having a simple pasta dinner. For anyone that knows me, you know how strange it is when I say that we haven’t made a pasta dinner all summer. I’ve had some pasta salads, sure, but it’s not quite the same thing.

A trip to the Nathan Phillips Square farmer’s market on Wednesday gave me the perfect opportunity to combine my love of pasta with my desire to not be stuck in front of a hot stove.

Tomato Basket

Tomato season is in full swing here in Ontario, and I was inundated with piles and piles of fresh, ripe tomatoes of many varieties. I bought a few piles, in three varieties. To justify this purchase, I had to think of something that would use up a bunch of them at once. A raw tomato sauce was in order!

If you’ve never had a raw tomato sauce, you might be amazed at how simple and quick it is. It’s pretty much how it sounds – a sauce made up of uncooked tomatoes. “Sauce” might be a misnomer, though, as it’s almost more of a tomato salad that you toss with hot pasta.

There – I gave away my secret.

Chopped Tomatoes

The real secret is just how amazing it tastes when you have fresh, LOCAL tomatoes on hand. Like a tomato salad, it really won’t work with mealy tomatoes, or tomatoes that spent most of their ripening on a truck. I picked up a basket of roma tomatoes for this, but you could use your favourite unmealy (is that a word?) tomato.

The recipe I used can be adapted to your taste – use the kind of tomato you like best, use the herbs you like best, the oil you like best, the shape of pasta you like best (although short stubby ones like penne seem to work best). I added in some grilled eggplant, and I think next time I might add some blanched green beans for crunch. It’s a dish that is as easy to customize as the usual pasta sauce, but without all of the stewing and cooking stuff.

Recipe after the jump!

Continue reading Tomatoes in the Raw

What do I do with this? Chayote

Chayote

I’m finally catching up on my summer challenge here… finding fresh produce that I had never used before, mostly because I didn’t know what they were.

This week’s new thing is the chayote, a mexican fruit that is used like a vegetable, and sometimes referred to as the “vegetable pear”. It’s simple, and fresh tasting and doesn’t require any special preparation. To compare it to some other things you may have had before, it’s light and mild and crunchy like a daikon radish, or even a drier cucumber. Or maybe the texture of a green apple, but not the flavour? It can be used in cooked dishes, but is great raw in salads. For my first test of this vegetable, I tried both options.

I didn’t look up any recipes, and really just modified some recipes that I already enjoy.

Chayote Enchiladas

Chayote Enchiladas

To test it out, I used it in the filling for some enchiladas (that we cooked on the BBQ!) and as the crunch factor in a yummy corn and black bean rice salad.

First, let’s talk about the enchiladas. I first made enchiladas a few months back, as a part of a Daring Cooks’ challenge. I used the sauce recipe from that, as the tomatillo and poblano sauce is tart and fun, which is perfect for the summer. The veggie layer was made up of sauteed portabello mushrooms, onion and lightly cooked chayote. We did not, however, want to use the oven. It’s been a really hot and humid summer here in Toronto, and we do our best to avoid using the oven. I made a crazy decision, and we packaged them in foil and cooked them on the BBQ. This requires that you NOT put too much of the enchilada sauce in the stacks. Just put a little on each layer, and add the rest when serving. It worked like a charm! The only thing I would change is maybe spray some oil on the foil before layering the enchiladas. The hot cheese and tortilla stuck to the foil a little bit… no big deal. The chayote added a fun crunch to the cheesy, spicy mess.

Chayote Rice Salad

Chayote Rice Salad

The next dish I made was a Mexican spiced rice salad, full of grilled corn, black beans and bell peppers – oh yeah, and chayote. I think chayote really shines in salads, because it is nice and refreshing with a great crunch. Because it doesn’t have a really strong flavour, it could fit into just about any salad. I did go pretty heavy on the spices, using a mild ‘chili’ blend that I keep on hand, featuring paprika, cumin and various mild chili powders. To this, I added a touch of chipotle for smokiness and a touch of heat.

So… there are two ways to use a chayote. I’m sure there are about a million more!

What do I do with this? Karela

Desi Karela / Bitter Gourd

This post should be subtitled, “Are you trying to poison me? My lips are going numb!”

I picked the strangest looking vegetable from BJ Supermarket, in the Gerrard India Bazaar. Its bumpy, bright green flesh was intriguing. The sign said ‘Desi Karela’ – I had never heard of it before, so I wrote it down.

A quick Google resulted in many pictures of half-naked girls. Oh wait, I mistakenly typed ‘Desi Kerala’ (Kerala being a state in India).

A quick correction brought me to the vegetable I was looking for… and it turned out to be Bitter Gourd. I had read about bitter gourd before – sometimes in recipes with no mention of the fact that this gourd is, in fact, evil. Other times, the author would curse the evil within, with comments such as “Why would anyone ever want to eat this?!”. Although frightened, I refused to give up and I found a recipe that sounded like the perfect way to introduce myself to Desi Karela.

Curried Bitter Gourd

I chose this recipe from Foodskaypes, because the mix of bitter gourd with coconut and tamarind sounded really tasty and different from the dishes I usually make. In case you are planning to click that link and read the recipe – no, I didn’t buy a fresh coconut and grate it for my dish. We aren’t used to fresh coconut here, so I bought the packaged (unsweetened) stuff. No doubt it isn’t as good as fresh, but you gotta do what you gotta do.

The dish smelled amazing as it was cooking. It was a fun assortment of spices (yay!), and I crossed my fingers that the karela wasn’t too bitter. Then I tasted the sauce. It was so bitter that my heart immediately sank, and I scolded myself for not making a backup dish. I knew J would NOT like this.

We sat down to eat, and I took my first bite. Yowza, that gourd is bitter! Bite two wasn’t so bad, and by bite three I noticed a flavour beyond the bitter that intrigued me, something I’m sure I haven’t tasted anywhere else. I looked up at J, who had also taken about three bites. “That’s about all I can do. My lips are going numb.” That was that. I finished his plate, and gave myself a little bit more, and he went to the fridge for some pitas and veggies.

I should mention that the recipe itself was great, and I’ll be trying it again with some other, less evil vegetable.

I don’t think I’ll be buying desi karela again, but I’m really happy I tried it once. The leftovers are still in my fridge, waiting for me to finish them. I’m kind of afraid of what it will taste like – you know how evil is when given time to collude.

Sorry, J. I swear I didn’t try to poison you!

Caprese Salad – A Summer Classic

Caprese Salad

Caprese salad is one of those things I take for granted. I think of this the way some people think of an iceberg salad – simple, fresh and super quick to make. I almost didn’t want to post this, because I figure everyone already makes Caprese salad. This post is for the folks who have never tried this delicious salad, or had it at a restaurant once and thought it must be more complicated than it looks (it isn’t).

The basic recipe contains very few ingredients: tomatoes; bocconcini or buffalo mozzarella; fresh basil and is dressed with a bit of olive oil, salt, pepper and sometimes (but not always) balsamic vinegar. This is a perfect salad for the summer, and a great break from leafy greens.

Cluster Tomatoes

Wee tomatoes growing in my balcony garden. So darn cute!

The star of the Caprese salad is the tomato. You really need to have the freshest, tastiest tomatoes that have no mealiness to them (so, really, beefsteak tomatoes are kind of out). I like to use Campari tomatoes (like the ones shown below), romas, cherry or grape tomatoes from the local farmers’ market… but my favourite new thing is to use tomatoes out of my own garden. This is the first time I’ve grown tomatoes, and I giggle every time I pick a tomato off of my plant. Nice.

There are many variations on this salad, but this follows the most basic set of steps. One really important thing to remember is that the slices of tomato should be a similar shape and size to that of the cheese. This can result in a salad made up of layered rows of ingredients, or a toss of chopped ingredients. It’s really up to you. I generally like the layered look. I really like the look of big slices of tomato layered with big slices of cheese — but that can be harder to eat, so I usually get the smaller balls of bocconcini to pair with cherry or grape tomatoes.

Tomatoes

Campari tomatoes, still on the vine.

Recipe after the jump!

Continue reading Caprese Salad – A Summer Classic

Indian Chickpea Salad

Indian Chickpea Salad

Today’s salad is inspired by Indian spices and flavour combinations. I’m obsessed with my collection of spices, and I was happy to be able to pull out some of my (recently ignored) Indian spices today.

Possibly the most exciting part for me is the amchoor powder. Amchoor is powdered dried mango, and it has a really neat tart flavour. I have to say that I don’t use this one all that often – it’s not that in many recipes that I come across, and I sometimes forget that I have it. Today was very different – this was the first thing I thought of when I decided to make chickpea salad.

It started with me coming across my stash of dried chickpeas. I decided to try cooking them up again, even though I have never been successful at this task. The price of canned legumes keeps going up so I thought I should give it another go. More on that later. Jump to a couple of days later, nicely cooked chickpeas at hand, and me coming up with ideas for my Indian-inspired chickpea salad. Summer salads should be fun, fresh, zesty, and exciting… ding, ding, ding!! I thought of the sour amchoor powder at the back of my spice drawer.

Mixed with other spices, such as cumin, coriander, tumeric and cayenne, I was able to make a very flavourful dressing that wasn’t heavy or creamy. I opted to add in some fresh veggies and fruits to round it out, including some just perfectly ripe apricots for a little more sweet and sour – I would have used mango, but apricots are in season here, and I thought something fresh and local would be best.

Dried Chickpeas

Dried Chickpeas

About the cooking of the chickpeas… in the past, I have failed miserably at cooking up dried legumes. They often came out mushy or mealy and just plain terrible. That said, buying them dried is much cheaper than buying them canned, so I thought it couldn’t hurt to try again.

I started with 2 cups of dried chick peas, soaking them in a LOT of water in the fridge. I read to soak them overnight, but I ended up soaking them for two (only because I didn’t have time to do anything with them right away). I discarded the soaking water each day, and just before cooking. I cooked them in a large pot of boiling water and it only took about 40 minutes (brought to a boil, then simmered). I tested along the way, just to ensure I didn’t overcook them. I should also add that I didn’t add anything to the soaking or cooking water – no salt, flour, baking soda… nothing. They cooked up perfectly. As good as canned, if not better. Two cups of dried chick peas probably yielded 5-6 cups of cooked, and it cost less than a 19oz can of chickpeas, which would only contain about 2.5 cups.

Recipe after the jump!

Continue reading Indian Chickpea Salad

Almond Pista Kulfi (a Bite of Blog Love)

Almond Pista Kulfi -side

This post is part of a “Blog Bites” challenge issued by Nupur, of the blog One Hot Stove. This month, we’re asked to pick ANY recipe from the blog of our choice, make it, take pics and blog about it. The spirit of the “Blog Bites” challenge series is to get us checking out other food blogs and posting about our experiences, while giving due credit to the original poster. This also fits with the ‘Blog Love’ series I started back in June…

I had already found the perfect recipe when I saw the challenge. Sweet! (Literally)

I have always wanted to try making ice cream, but I don’t have an ice cream maker (and try not to buy unitasking gadgets). Summer brings a slew of amazing sounding ice cream recipes which, for the most part, just depress me into trying to justify making an ice cream maker (can I make dinner ice cream?).

Then I came across a recipe for Almond Pista Kulfi, posted by indosungod on Daily Musings.

Kulfi is an Indian frozen dessert that is made with milk, instead of cream, so doesn’t require an ice cream maker. They often come in flavours like mango, almond, pistachio – and can contain ground nuts. This recipe is a combination of almond and pistachio.

Ground Almonds, Pistachios and Vanilla Beans

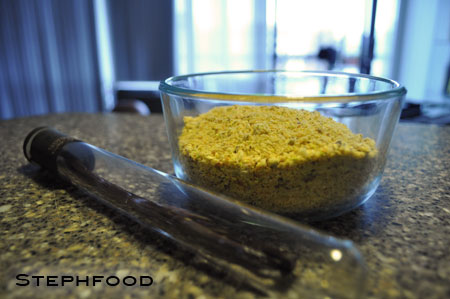
Vanilla Beans with Ground Almonds and Pistachios.

I first had to roast my almonds and pistachios, and then grind them coarsely in the food processor. Since I had some on hand – and totally love them – I decided to add vanilla bean, as well as a few drops of almond extract.

You start by cooking down some whole milk and condensed milk on the stove, adding in a few ingredients and cooking it down a little more.

Making Almond Pista Kulfi

Making kulfi. It may be too thick already…

Here is where I ran into some trouble. Never having made kulfi before, I wasn’t sure how thick it should be. Initially, I followed the instructions, cooking the milk down for a certain amount of time. After adding in some ingredients and letting it thicken, you’re supposed to cook it down a little bit further. I did take it off earlier than it called for, thinking it was thick enough… but it was actually too thick. It was actually too sticky to freeze all the way through!

The next day, I decided I would try to fix things. I warmed up a little more of the whole milk and stirred it into the “semifreddo” concoction, crossed my fingers and stuck it back in the freezer. It worked!!

Writing instructions for these kinds of things can be tricky, because different stoves and cookware can cook things differently. Trial and error are definitely required! I now have a better idea of the consistency it should be when done. I know this sounds gross when talking about dessert, but it had the consistency of clam chowder (sans lumps) before freezing. Thick, coats the spoon, but not too sticky.

Almond Pista Kulfi - top

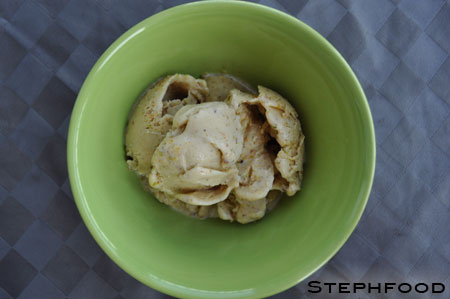
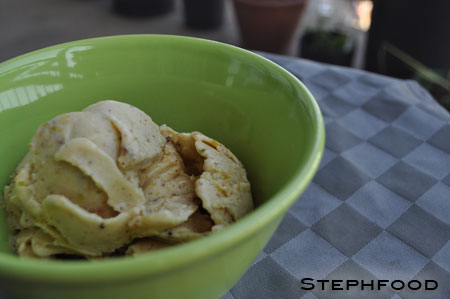
Back off! This bowl is MINE!

Sooo delicious! Once I’m done killing this batch, I’m going to make a cardamom coffee one!!! Can’t wait!!

Recipe after the jump!

Continue reading Almond Pista Kulfi (a Bite of Blog Love)