This was very nearly going to be a cranky post.
Instead, it is a tale of overcoming hardship broken, oogy buttercream frosting.
I really should have taken a picture of it, but I was so upset at the time that I didn’t think to. Let’s rewind.
This was my first attempt at buttercream frosting, to go along with my first attempt at making cupcakes from scratch. The cupcakes were brilliant, so I think I got a little cocky. I started the buttercream frosting, excited to think of the yumminess that would be the reward for my hard work. It started off well enough. I followed the instructions carefully, even looking online to try to figure out the difference between “hard peaks” and “dry peaks”. I added in the butter and things got a little chunky. Not to worry!! The recipe said this might happen, and to just keep mixing it at medium-high speed.
It just got worse.
It went from “almost there, just a little lumpy” to “oogy, clumpy and soupy”. I stopped the mixer and just stared at it, my face falling. Then, I picked up my computer.
“How to fix a broken buttercream frosting”
“Lumpy buttercream frosting”
“Butercream frosting disaster!”
Finally, I found a post on a board where someone had the same problem I did… and an answer that made me think I could still pull it off.
Published March 1, 2001. From Cook’s Illustrated.
Can I save broken or curdled buttercream frosting?
Given proper proportions and supervision when its sugar base is cooked, buttercream frosting can be made quickly and easily. But cooks are inclined to read catastrophe into their finished efforts if the icing looks curdled or broken. However, appearances can be deceiving and most problems with buttercreams can easily be corrected.
The biggest threat a buttercream faces is temperature. If the frosting appears soupy and slippery, it’s likely grown too warm. Plunge the bowl into an ice bath and whisk briskly until the icing becomes silky and cohesive again. If the buttercream resembles fine-curd cottage cheese and slides about in the bowl, it’s likely too cold (from cold butter or a chilly ambient temperature). Wrap a steaming hot dish towel, turbanlike, around the bowl to heat it up and whisk or stir it with a wooden spoon to bring the icing back to its shiny, satiny self.
I had to read it a couple of times, and then I laughed. My frosting seemed to have a little bit of both problems, being both soupy and clumpy. First, I plunged it into an ice bath and while things started to firm up a bit, it really just turned back into butter. I put it back on the stand mixer, with no success. I then decided to put it back on the steam to melt it all down and start over. After it melted down, I plunged it back into the ice bath and whisked it by hand as the mixture cooled. Once I thought it had cooled enough, I pulled it out of the cold water and kept whisking. My arm was getting tired and sore (can you tell I don’t do this kind of thing often?!), and I was just about to give up on the clumpy mess when it suddenly began to change, and become a smooth and creamy mixture.

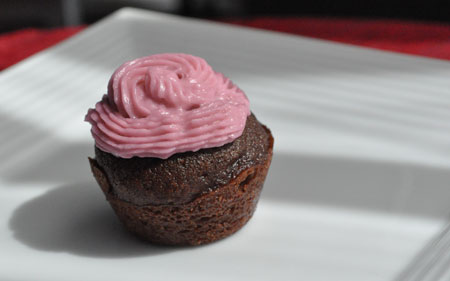
Mini Cupcake with Buttercream Frosting
I did it! I actually fixed it!
In some ways, this was probably better than the recipe working out right away. It made me do a little problem solving, put in a little bit of elbow grease, and in the end I was proud of what I had learned.
As I keep learning, it isn’t about the recipes that go off without a hitch, it’s learning what to do when there is a hitch.
I added a bit of colour to my newly made frosting, added some to a piping bag and did a few test swirls on some mini cupcakes.
What delicious science!
(P.S. I was using the Swiss Meringue Buttercream frosting recipe from Martha Stewart’s Cupcakes book)


