Greeky Pt2 – Eggplant Bundles

Eggplants

This is the first installment of my ‘Cookbook Diving’ series, where I dig up recipes from my lonely little cookbooks. I have a number of cookbooks that I rarely use, especially now that it’s so easy to find recipes on the internet. I thought it was about time I start finding some tasty treasures on my own bookshelf, so here we go!

Earlier, I posted about our Greek themed meal featuring my first attempt at Spanakopita. Since we couldn’t make an entire meal out of spinach pie, I thought I should dig around for some other treats. I decided to make eggplant bundles, stuffed with tomato, herbs and cheese. This recipe is actually from an Italian cookbook, but since many of the ingredients cross over with Greek cuisine, I thought I could modify it to make it work with our meal. I did the obvious, and simply replaced the herbs and the type of cheese used, since they wouldn’t change the basic structure of the dish.

Eggplant Bundles

This pic gives you a bit of a peek inside at the tomato… sneaky little food!

These were very simple to make, but some of them didn’t want to stay together when I flipped them on the baking sheet. No worries! It’s pretty easy to just stuff it all back together. I modified the original recipe to coat the bundles with the leftover butter/herb/spinach juice from the spanakopita, which worked really well and added some extra flavour. There was also a sun-dried tomato dressing that was meant to be drizzled on top of the bundles when served, but I just left that off. I don’t think it was missing anything.

After a little bit of digging, I found something new in one of my dusty cookbooks. I wonder what other hidden gems I’ve been sitting on!

Broiled Eggplant Bundles – Greek Style

Serves 4, Modified from an Italian recipe in the book La Cucina Italiana edited by Gabriella Rossi

  • 2 large, long eggplants
  • 1/4 lb feta cheese
  • 2 plum tomatoes
  • 8 sprigs of parsley and/or dill
  • 2 tbsp dried oregano
  • 2 tbsp olive oil
  • salt & pepper

Preparation:

  1. Remove the stalks from the eggplants and cut them lengthwise into thin slices — the aim is to get 16 slices in total (about 1/4 inch thick). Ignore the first & last slices.
  2. Bring a large pan of salted water to a boil an cook the eggplant for a couple of minutes, or until just softened. Drain the sliced eggplant and pat dry using a clean towel. Set aside.
  3. Mash the cheese a little, so there aren’t any big chunks.
  4. Cut each tomato into 8 slices, ignoring the first & last slices.
  5. Take two eggplant slices and place on a baking shet, forming a cross. Place a slice of tomato in the centre of the cross, season with salt & pepper, then add a sprig of parsley and/or dill, followed by a dollop of cheese, a sprinkle of oregano, a slice of tomato and more salt & pepper.
  6. Fold the ends ofthe eggplant slices around the cheese and tomato filling to make a neat bundle. Repeat with the rest of the ingredients to make 8 bundles. Chill the bundles for about 20 minutes.
  7. Preheat the broiler. Brush the bundles with oilive oil and cook for about 5 minutes on each side, or until golden. Serve hot.

Greeky Pt1 – Spanakopita

herbs

Greek spinach and feta pie, spanakopita, has been a favourite of mine for years, but I had never tried making it before. A couple of weeks ago, I was watching or reading something that said that even a child could make it, it was that easy. I got offended and decided to make some myself. It was pretty darn easy!!

Let’s forget the part where I didn’t know how to deal with filo and took it out of the freezer RIGHT when I needed to use it. I mean, the recipe I had didn’t mention anything about thawing out the filo, so how was I supposed to know you’re supposed to thaw it in the fridge for 12-24 hours before you need it! As panic was sinking in, I made things worse by searching the internet for “how to quick thaw filo”, only to find the direst warnings NOT to try to quick thaw filo. Crap on a stick. Ignoring all of the warnings, I laid the frozen roll on my cooktop (the oven was on, and keeping things a little warm) and slowly warmed and rolled out the filo. There were a few more cracks than there might have been otherwise, but I was so relieved to be able to resolve the problem quickly and move on to the building of my pie. I have modified the recipe below to include that the filo needs to be THAWED, argh.

Spanakopita

The results were delicious!!!

It turned out fantasticly, and we probably ate more of it than we should have. I should mention that I made half of the recipe listed below — but keep in mind that you still need about 14 sheets of filo. I just made it in an 8×8 pan instead of 9×9, requiring less filling, but the same number of filo sheets (just shorter ones). It was probably a little flatter because of this, but no less delicious. Seriously, we didn’t need bigger!

When I first saw this recipe, I saw that there was dill and parsley and no oregano. I thought that was odd (huh, dill, weird). On first bite, I realized that the dill flavour really makes it. We ate this with a lovely spread of Greek-inspired food, such as dolmathakia (grape leaves stuffed with rice and herbs), various greek olives, feta and tomatoes with oregano, grilled squid and some lovely eggplant bundles (which will be covered in a future post). Also, lots of wine (sorry, I didn’t have any Ouzo or Metaxa).

I’m actually making a greeky brunch for us tomorrow, too, thanks to the new Food & Drink magazine. More on that later!

Spanakopita (spinach filo pie)

6 to 8 servings
modified from this recipe

  • 3tbsp Olive oil
  • 8 Scallions, chopped
  • 2lbs Spinach, cleaned and destemmed
  • 1 cup Fresh dill, chopped
  • 1 cup Italian parsley, chopped
  • 1/2 lb Feta cheese, crumbled
  • Salt and pepper to taste
  • 1-2 Eggs, beaten
  • 12-14 sheets Filo dough, thawed (follow the instructions on the package)
  • 1/2 cup Melted butter or olive oil

Preparation:

  1. Preheat oven to 350°F. Heat 2tbsp butter or oil in a large skillet or sauté pan over medium-high heat. Add the scallions and sauté for about 2 minutes. Add the spinach in batches, stirring each addition to wilt. Finally stir in the dill and parsley. Remove to a colander or strainer and allow to cool somewhat.
  2. When the spinach is cool enough to handle, squeeze out any excess liquid. Remove the spinach to a cutting board and coarsely chop.
  3. Mix together the spinach, feta, salt and pepper in a large bowl. Adjust seasoning to taste and stir in the eggs.
  4. Grease a 9-inch square baking dish or a deep-dish pie tin. Lay a layer of filo over the dish and brush with butter or oil. Add 5 or six more sheets of filo, each at a different angle to cover the entire bottom of the dish, brushing each layer with butter or oil before adding the next. Press the filo carefully down into all corners of the dish.
  5. Add the spinach-cheese filling to the dish and spread out evenly.
  6. Using the remaining filo, repeat the process of adding layers to form a top to the dish. Trim the edges of filo to leave about 1 1/2 inches hanging over the edge of the dish. Roll the edges together toward the center of the dish to seal the spanikopita.
  7. Place the dish in the preheated oven and bake until the crust is nicely browned, anywhere from 45-60 minutes. Remove from the oven and cool for about 15 minutes before serving.

Recipe Mashup: Baked Sweet Potato Pasta

This is my usual way of dealing with recipes – I steal from them and I smash them together.

Until I started my blog, I didn’t really follow recipes closely. I usually just use them for inspiration. I figure out what ingredients I have on hand, and I Google my way to a few recipes that sound neat. I take a little bit from one and a little bit from another, and there we go!

Tonight’s dinner was fueled by my wish to bake a pasta dish, and the sweet potatoes that were waiting to fulfill their delicious destiny.

I took most of my inspiration from Martha Stewart: Baked Mushroom Linguine and Butternut Squash and Sage Lasagna. Some people like to mock Martha, but honestly I’ve had great success with recipes from her website. I’m not embarrassed to say that I enjoy her show (on the rare occasion I’m able to watch it) and it’s now one of my go-to sites when I can’t think of what to make for dinner.

On that note, I think I need to add her link to my blogroll. Done!

Pasta Mashup - Oven Dish

Mashup Pasta & Sweet Potato Casserole

Soo… here’s what I did: I cooked up some rotini (ok, not either of the recommended types of noodle); baked my sweet potatoes as suggested in the squash recipe; loaded up a cheese sauce with some cream cheese, some Fizzy cheese from Quebec, herbes de provence, thyme, rosemary, nutmeg, cayenne and tangy mustard powder; sauteed some mushrooms and onions with mushroom broth; tossed it all together and threw it back in the oven topped with breadcrumbs. Whew!!

Pasta Mashup - Plate

Pretty yummy!

So, how did it turn out? Not bad! The cheese sauce is a little different from my usual (shock! I didn’t put any anise in it!) and I’m usually too lazy to make a meal and THEN put it in the oven to bake. I ended up putting in too many noodles, which meant the sauce wasn’t as vibrant and saucey as it should have been. Blerg! I didn’t think the breadcrumb thing through – it ended up being a little too dry, because the sauce was mostly absorbed into the pasta. So I had to add a little more liquid and stick it back in the oven. Live and learn.

My Very Own Thali

Indian Thali

I love Indian food. I love the spices, I love the mix of textures and flavours, and I absolutely love the variety you get in an Indian Thali. Indian thalis are platters that feature a number of dishes, alongside some kind of bread (such as naan or chapati) or sometimes rice. Most of the Indian food that people are familiar with  are from North India, but it is important to note that there are many regional differences in Indian food. This is something I’d like to learn a little bit about, but I haven’t started researching it yet.

Indian Thali

My first Thali (clockwise from the top): Baingan Bharta, Saag Paneer and Chole.

I love to make Indian-inspired dishes at home, but haven’t had much success at making restaurant style dishes until recently. A few weeks ago, I tried a Palak Daal recipe that was fantasic but very lonely. We’re used to having multiple dishes in an Indian meal, so my loney daal didn’t go over as well as it should have. This inspired me to try making a group of dishes at once.

There are two challenges for me here: successfully making restaurant-style Indian dishes AND making multiple dishes at the same time and timing it all out properly. It was a great experience, and left me with the confidence to try more in the future!!

Enjoy!

A mix of the spices I used in one of the dishes.
Recipes after the jump!

Winter Warming Ginger Tomato Soup

Ginger Tomato Soup

This is one of my favourite soups in the winter. It’s fresh and gingery, a little spicy and very hearty. For a more brothy, soupy soup, you can reduce the amount of barley to 1/2 cup. The introduction of either chipotle pepper (a smoked pepper), or smoked paprika gives it a rich, rounded flavour. Fresh ginger gives a bit of a bite, but also a slight citrusy flavour that cannot be replicated with dried ginger.

Feel free to add in any random veggies, or leftover stuff in the fridge (within reason). This kind of soup can be a great ‘use it up’ meal!

Ingredients:

  • 1-2 tsp oil
  • 1 medium onion, roughly chopped
  • 2 stalks of celery, chopped (plus some of the celery leaves, if you like)
  • 6 medium mushrooms, halved or quartered (depending on size and preference)
  • 1-2 medium carrots, cut into thick slices
  • 1-2 large potatoes, cut into big chunks
  • 2tbsp fresh grated ginger (dried will be quite different, so I do not recommend it)
  • 2 cloves of garlic, pressed or finely chopped
  • 1 tsp chipotle pepper, powdered (if you don’t want spicy, you can use smoked paprika instead)
  • 1 cup corn kernels (can use fresh, frozen or canned)
  • 1 796 ml can of diced tomatoes
  • 4+ cups of broth (a lightly flavoured one, like vegetarian or chicken, can substitute with water if needed)
  • 1/2 cup of chopped fresh parsley
  • 1 cup of barley, dried
  • salt & pepper, to taste

Instructions:

  1. Heat oil in a pot on medium heat.
  2. Once heated, add onion and celery. Cook until golden and soft – can add a tablespoon or so of broth or water to help with this. Be sure to cook off any extra liquid before the next step.
  3. Add the mushrooms, and saute until soft and lightly browned.
  4. Add the carrots, potatoes, ginger, garlic and chipotle (or paprika). Stir, and cook for a couple of minutes.
  5. Add the corn. If you’re using frozen or cold corn, cook until the corn warms up a little.
  6. Add the diced tomatoes.
  7. Add 4 cups of broth (or water). Make sure the liquid covers the vegetables completely. Add more broth or water if necessary.
  8. Cover. Let this cook for about 20 minutes on low heat.
  9. Add the barley. Cover, and cook for 30 minutes, or until barley is cooked through. Stir occasionally, and check to make sure everything is still covered in broth. Add more broth or water as needed.
  10. Add the chopped parsley and chopped peppers. Cook for another 10 minutes.
  11. Add salt and pepper, to taste.

Ethiopian Feast!

I first tried Ethiopian food about 10 years ago, on the recommendation of a colleague. A vegetarian at the time, I was looking for new restaurants, and new flavours that didn’t involve eating Babe (or his little friends). When I go for Ethiopian food, I always get the vegetarian platter. All of the restaurants make these, and they often contain many of the same dishes (or variations of them). Comprised of a number of stews, the dishes may be spiced legumes (lentils, split peas), vegetables, collard greens, all placed in colourful mounds around a fresh salad, atop what can best be described as a sourdough pancake.

Injera, the aforementioned ‘pancake’, is an important part of the meal. It lines the platter, it provides the grain portion of the meal… and acts as your utensil. The flavourful stews are grabbed up, and masterfully rolled into a piece of injera, dipped in Awaze, and quickly popped into your mouth. Injera can be made at home, or bought from a number of stores that carry the handmade bread. It is traditionally made from Teff, the world’s smallest grain, which can be hard to find and expensive in Canada. We opted to buy Injera this time around, but my husband “the bread guy” thinks he could pull off a good batch next time (having found Teff flour at Rube’s in St. Lawrence Market).

A close-up of the platter. Clockwise from 12: Gomen, Mesir Allecha, Mesir Wat. Centre: Awaze. MMmmmmmm.

This meal is great for those who love complex flavours, varied textures, a little spicy kick and breaking ripping bread with friends.

This was my second attempt at making Ethiopian dishes. The first try did not go so well, and I gave up. This time, I figured I had a better feel for the food, hopefully a better eye for the recipes, and a new favourite condiment to devour.

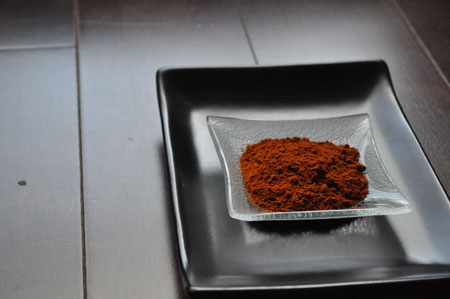
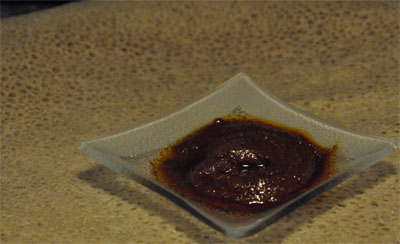
In my earlier post, I mentioned Berbere, a very important spice blend in many Ethiopian dishes. I also mentioned Awaze, the bold and spicy condiment that is made from Berbere. This is my inspiration for trying again, and having successfully made a batch of Awaze, I was determined to make food worthy of being dipped in it.

Want some injera or spices? Toronto has quite a few places that carry these items, but the ones that we shopped at this time around are Piassa Ingera (260 Dundas Street East) and, oddly enough, the Hasty Market at King & Dufferin.

Looking for someone else to make it for you? Try Ethiopian House Restaurant (4 Irwin Avenue, Toronto)

Want to try making it for yourself? Here are recipes I followed (slightly modified from recipes I found online). Don’t forget to refer to the Berbere and Awaze post!!!


Niter Kebbeh (spiced, clarified butter)

This is the start of many great Ethiopian dishes. This butter is full of flavour, and really can’t be omitted from the dish (although I generally use less than recommended in the original recipes). I made this well in advance, let it cool in a rectangular dish, then chopped into cubes and frozen. I should have enough Niter Kebbeh for the next 3-4 meals, maybe more!

Modified from this Recipe

Ingredients:

  • 1 pound butter
  • 4 tablespoons onion, finely chopped
  • 1 1/2 tablespoons garlic, finely chopped or pressed
  • 2 teaspoons fresh ginger, scraped and finely grated or minced
  • 1/2 teaspoon turmeric
  • 4 green cardamom pods, crushed
  • 1 cinnamon stick
  • 3 whole cloves
  • 1/8 teaspoon ground nutmeg

Preparation:

  1. Slowly melt the butter in a medium-sized saucepan over low heat.
  2. Add the other ingredients and simmer uncovered on the lowest heat for about 20-30 minutes. Do not let it brown.
  3. Strain the mixture through a double layer of cheesecloth or a fine strainer, discarding the spices.
  4. Refrigerate until set.

Gomen (Stewed Collard Greens)

The collard greens have always been one of my favourite parts of the meal. Their slightly bitter, buttery deliciousness is a great contrast to the lentil dishes and is a must for any platter. I actually doubled this recipe when I made it, and found that this was the perfect amount.

modified from this recipe

  • 1 large bunch collard greens, about 1½ pounds
  • 1 tbsp niter kebbeh, ghee or olive oil
  • 1 red onion, chopped
  • 2 cloves garlic, minced
  • 1-inch piece fresh ginger, peeled and minced
  • 2 fresh hot peppers, seeded and minced (or to taste)
  • 1 cup broth
  • ½ teaspoon salt
  • ¼ teaspoon
  • black pepper
  • ½ teaspoon cardamom
  1. Tear stems from collard greens, and wash greens well.
  2. In a large skillet or stir fry pan, melt the niter kebbeh (or oil). Add onion, garlic, ginger and hot peppers and simmer, stirring occasionally, about 5 minutes.
  3. Add collard greens, broth, salt, pepper and cardamom. Bring to a simmer and cook until most of water has evaporated from pan and the greens are very tender (this took me about 1/2 hour… leave some time!).

Mesir Wat (spicy red lentils)

This is my absolute favourite dish in the platter. The lentils are soft and spicy and creamy. The berbere spice is really hard to describe in this dish, as it adds not only spice but a really well-rounded warmth and flavour. This recipe makes a LOT of food, and could be halved (especially if made alongside the other two recipes here). I made the full recipe, and have quite a lot left over… but I’m fine with that. Did I mention this is my favourite? I may try freezing some to see how it holds up.

Serves 4 to 6 – modified from this recipe

Ingredients:

  • 2 onions, chopped
  • 1 cloves of garlic, crushed or finely minced
  • 2 tsp ginger, peeled and minced or grated
  • 2-3 tbsp Niter Kibbeh (or oil or butter)
  • 3 tablespoons berbere
  • 2 cups red lentils, rinsed
  • 4 cups, water or broth
  • salt & pepper, to taste

Method

  1. Place the onion, garlic and ginger in a food processor or blender and puree. Add a little water if necessary.
  2. Heat the oil, butter or niter kibbeh in a large, heavy-bottomed saucepan over medium flame. Add berbere and stir rapidly to color the oil and cook spices through, about 30 seconds.
  3. Add the onion puree and sauté until the excess moisture evaporates and the onion loses its raw aroma, about 5-10 minutes. Do not burn.
  4. Add lentils and water to the saucepan. Bring to a boil, reduce heat to low, and simmer, uncovered, until lentils are cooked through and fall apart, about 30 to 40 minutes. Add water if necessary to keep the lentils from drying out.
  5. Stir in salt and pepper to taste and serve.

Mesir Allecha (mild lentils)

These lentils are mild and buttery. Although not the most stand out dish of the bunch, for me it offers a mild balance with the other dishes. I chose this dish to round out my platter. This recipe makes a conservative amount – which was fine with me, because I eat less of this one than the other two. Notice that the recipe calls for half the amount of lentils required in the Mesir Wat above.

modified from this recipe

Ingredients:

  • 1/3 cup onion, chopped
  • 2 garlic cloves finely minced or pressed
  • 1 tablespoon niter kebbeh
  • 1 cup red lentils (masoor dal), picked over, rinsed and drained
  • 1/2 teaspoon turmeric
  • 1/2 teaspoon salt
  • 3 teaspoons seeded and finely chopped jalapeño peppers
  • 4 cups water (adjusted as necessary)
  1. In a medium saucepan, soak red lentils for one hour in three cups of the water.
  2. Bring the lentils and water to boil and cook for 30 minutes until the lentils are soft, adding more water if necessary. Drain off any extra water and mash.
  3. Heat the niter kebbeh in another pan over moderate heat. Add the onion and garlic and cook for 3 minutes. Add the mashed lentils, turmeric, salt and hot pepper. Stir well.
  4. Add the remaining cup of water (or less, pour slowly) and cook for 3-4 more minutes more to reduce the mixture to a thick, well spiced puree.

From the Spice Drawer: Berbere and Awaze

Berbere is a staple spice blend in Ethiopian cuisine. Made up of a number of spices that are roasted and ground, the primary components seem to be fenugreek seeds, cayenne pepper and paprika. The ratio of cayenne to paprika control just how hot the berbere becomes.

Sometimes written as ber-beri (which gives you an idea of how to pronounce it, almost like ‘Burberry’), it imparts a warm red colour to any dish that uses it as the primary seasoning.

Berbere is also used to make a strongly flavoured condiment, called Awaze. A mix of berbere, garlic and wine, it is a deep, dark, spicy paste that can be used for dipping. This condiment is one of my favourite additions to my Ethiopian platter, adding an extra kick in combination with the injera (bread) and stews.

Watch for the Friday post for details of my attempt at making an Ethiopian platter! Sooo good!

Awaze

Awaze Paste

original recipe can be found here

Ingredients:

  • 1 cup berbere (mild red chili pepper spice blend)
  • 1 tsp mitmita (hot chili pepper spice blend) *optional, only if you want it to be REALLY spicy
  • 2 tablespoons olive oil
  • ¼ teaspoon garlic powder
  • ¼ cup dry red wine or dry sherry or Tej (Ethiopian honey wine)
  • ½ cup water
  • 1 tablespoon fresh lemon juice
  • ½ tablespoon fresh ginger juice
  • ¼ teaspoon black pepper
  • Salt to taste

Preparation:

  1. In small bowl, mix the berbere, mitmita (if included), garlic powder, black pepper.
  2. Add wine (or sherry or tej), oil, lemon juice, ginger juice, water, salt to taste; whisk it well.
  3. Keep in the fridge; serve it cold.

I Love a Man with Mussels

This is a post about love, romance, and eating weird little creepy things out of their shells.

Some people have a hate-on for Valentine’s Day, and I used to be one of those people. I’ve eased up a little since then, realizing that every holiday (like every other day) is what you make of it. I choose to make it all about food. Surprise!

This past year, we’ve been opting for less fancy meals out for some of these ‘romantic evenings’, and have often ended up at our new favourite place to get mussels, The Fat Belgian. It’s cute, and not at all pretentious, with a great selection of beer (Erdinger and Fruli Strawberry on tap, woo!) and mussels. I’ll admit that I haven’t actually tried any of their other food, because we ALWAYS get mussels, frites and beer… and the odd dessert.

Moules

Lots of yummy mussels, in a broth filled with gruyere, walnuts and leeks.

To top it off, we almost always get the same friendly waitress, who shares my name and alma mater but only knew me as ‘purple hair’ until our last visit (unfortunately, she no longer works there, so we didn’t get her this time). The view from the second floor is unfortunate, looking out to a bright green tire place on one side and a boob/owl-themed stinkbar on the other. I won’t hold it against them – they can’t choose their neighbours.

Mussels are a very strange thing. Unlike some other seafood, mussels are often paired with very flavourful things, at least partly because the mussel meat has a stronger flavour that can handle other strong flavours. Most of the time, you will find mussels steamed with very flavourful broth, often including some kind of alcohol, and only a scattering of thinly sliced veggies (if any at all). This is best paired with some fresh frites and/or artisan bread (like sourdough).

We had a great Valentine’s meal.

I took the plunge last year, and finally tried making them myself. It was as easy as friends had reported, and now I’m trying to make a chart o’ fun. Basically, I have some of the basics down and am coming up with a few variations on the basic steamed mussel dish. My recipe/chart o’fun will be featured in an upcoming post!!

Crêpes d’Amour

Crêpes. They’re the kind of dessert that you can pretend are a meal. At least, that’s how I do it.

My valentine breakfast included some of these buttery, pliable treats filled with homemade crème pâtissière and raspberry rhubarb sauce. They were sweet, sour, creamy and delicious.

Empty Plate

They were so good that I forgot to take a picture.

I swore to take a picture of round 2, later on.

Crêpes

3 Dessert Crêpes

Round 2 crêpes were filled with three different fillings: my usual favourite, nutella and banana; nutella and cream cheese (tastes like a cheese cake!) and the rest of the custard and rhubarb sauce from breakfast. Sooooo good!!

This time, I used a crêpe recipe from the Martha Stewart site. Next time, I’m going to try one from Vegetarian Times as a comparison. The main difference between the two is the number of eggs (three) and inclusion of butter in the Martha batter. The VT version only contains one egg, which should affect both the texture and flavour.

I’m also going to have to try savoury crepes, or galettes, using buckwheat flour. These could be filled with just about anything, cheeses, pesto, spinach, mushrooms, peppers. Yup, still lots of fun to be had!!

Recipes (from the Martha Stewart website):

Challenges

The thing about challenges is that they are, well, challenging.

Part of the reason I started this blog is to challenge myself to try new things, learn some new dishes and have fun. I was told about a site called the Daring Kitchen, where challenges are issued each month and members are required to follow the same recipe (with few alterations permitted). This was just the kick start I needed, so I signed up for an account. I won’t actually hear back about starting the challenges for a couple of weeks, however.

I decided to try one of their prior challenges to get warmed up, jumping right into an area that I have never tried before – pastry. I started with the recipe for Salmon en Croute.

20100206_SalmonCroute_0015

Salmon en Croute – fresh out of the oven!

I’m not really much of a baker, so I enlisted the help of my husband, who helped by making the short crust and rolling it out. Neither of us have worked with pastry crusts before, so we found it to be pretty tricky to work with. It did not turn out exactly as described in the recipe, or the helpful video tutorials. After much work, and a little creativity, we managed to wrap the salmon in the pastry dough and get it into the oven.

Imperfect, yes, but still a success! It was a fun learning experience, and it tasted great!

Complete! Salmon en croute for dinner.

Complete! Salmon en croute for dinner.