Lentil Salad w Fennel, Arugula, Orange

Lentil Salad w Fennel

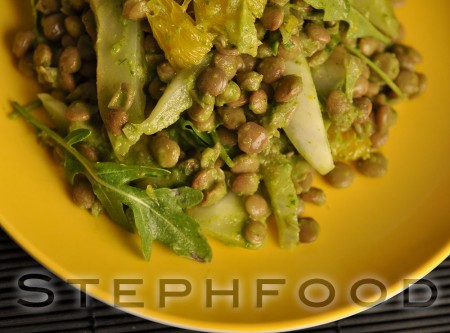
Salad season is here, and I’m back on the hunt for salads with substance. This lentil salad is full of good stuff.

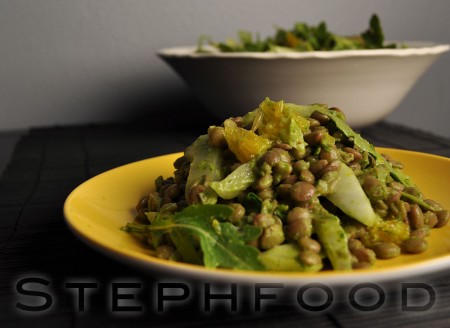
One thing you may notice when looking at the recipe… my photos are missing the feta. Man, oh, man! Don’t forget the feta! Sure, the salad was great without it, but the feta adds a great tang and saltiness that makes it so much better. Initially, I was going to leave the feta “optional”. No longer.

You are not allowed to skip the feta.

Lentil Salad w Fennel

Lentil Salad w Fennel – sadly, missing the feta

I love lentils, but they feel like such a winter food. Stews, soups, rich sauces – they’re mostly associated with winter comfort food. I wanted to show how easy it is to incorporate them into summer cooking. They are so incredibly good for you, and are really quick to cook up from dry.


Lentil Salad with Fennel, Arugula and Orange

Ingredients

  • 2 cups dried lentils (green or brown)
  • 4 cups arugula
  • ⅔ cup olive oil
  • 1 large orange
  • 1 small garlic clove, peeled
  • salt and pepper, to taste
  • 1 small fennel bulb, quartered
  • feta, crumbled, to serve

Preparation

  1. Add dried lentils to a large pot of water. Bring to the boil, turn off the heat and leave for 30 minutes. The lentils should be tender, but still intact.
  2. Once cooked and drained well, put into a large bowl.
  3. While the lentils are cooking, grill the fennel quarters just until they have some grill marks on them. Remove from the grill and set aside.
  4. Zest the orange until you have 1 teaspoon. Set zest aside.
  5. Half the orange, and juice one half. You should have about ¼ cup of orange juice. Add juice to reserved zest and set aside.
  6. Carefully cut the orange segments out of the last half of the orange. Carefully peel off and discard the membrane covering the segments and pull the orange apart into smaller pieces. Add to the fennel and set aside.
  7. Put half the arugula, olive oil, garlic, and the orange zest and juice into a food processor. Process until smooth. Season with salt and pepper and gently toss with the lentils.
  8. Fold in the rest of the arugula, grilled fennel and orange segments.
  9. Crumble a bit of feta on top and serve.
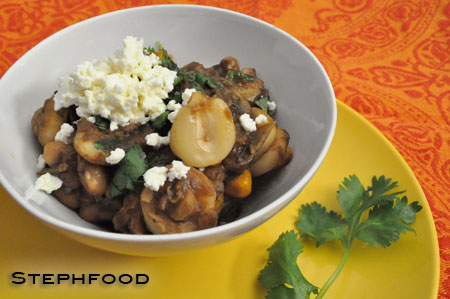
Warm Chickpea Salad

Warm Chickpea Salad

Salad season is almost upon us… almost. This chickpea dish can be served warm or cold, depending on how co-operative the weather is being :)

This time around, we ate it warm.

I just got a new zester, so I’m a little obsessed with putting lemon zest in stuff. I love the blend of lemon zest, olive oil and chili flakes. Oh so good!

I’m also a sucker for nicely sautéed leeks – white AND green parts, thankyouverymuch! Sometimes I just cook up a bunch of them, and add them to every dish. It makes a really good condiment.

To prepare leeks:

  • cut off the root end, and the dried tops
  • half each leek across where the white meets the green
  • half the white part lengthwise, and do the same for the greens (by breaking them where they fold)
  • WASH LEEKS VERY VERY WELL – dirt gets into the layers of the leek, so put them under running water and wash in between the layers as best you can
  • drain well

They take a bit of prep, but are really worth it! I usually prep the whole bunch at once, and keep them in a ziplock bag in the fridge.

Warm Chickpea Salad

Warm Chickpea Salad with Tomatoes and Parsley


Warm Chickpea Salad with Tomatoes and Parsley

Ingredients

  • 1 cup coarsely chopped parsley
  • zest and juice from 1 small or 1/2 large lemon (approximately 2 Tablespoons juice,  1 Tablespoon zest)
  • 1/4 – 1/2 teaspoon chili flakes (to taste)
  • 4 Tablespoons olive oil
  • 2 cups cooked chickpeas (roughly 1 can)
  • 1 leek, sliced into 1/4″ half rings
  • 1-2 cloves garlic, minced
  • 1/2 pint grape tomatoes, halved
  • salt and pepper, to taste

Preparation

  1. Make the dressing by combining the parsley, lemon juice, half of the lemon zest, about 1/4 teaspoon of the minced garlic, chili flakes and 3 tablespoons of olive oil. Mix, and set aside.
  2. In a sauté pan, add about a tablespoon of olive oil. Sauté the leeks until softened.
  3. Add the rest of the minced garlic, lemon zest and chili flakes and cook for another minute.
  4. Add the chickpeas and cook through, stirring regularly to coat with the other ingredients. Season with salt and pepper, to taste.
  5. Toss in the cherry tomatoes, remove from heat, and immediately toss with the dressing.

This dish is great served warm or cool!

Spring Cleanup! (Week 3)

Slow-Cooker Chili

After last week’s sad list, I amped it up for this week. My success this week was in part due to the Easter weekend – we didn’t have time for groceries, so I had to make do with what we had on hand.

Use-it-up tally:

  • Chili – this was a lifesaver one day when I didn’t have any leftovers for lunch!
  • Italian sausage – used in a pasta dish
  • Paneer – used in an indian peas and cheese dish
  • Green peas – used in an indian peas and cheese dish
  • Fesenjan sauce – used in a pulled fesenjan dish
  • Chicken breasts – used in a pulled fesenjan dish
  • about half of the pierogies

My highlight of the week was the pulled fesenjan. With the sauce pre-made, all I had to do was throw the chicken breasts into the slow-cooker with the sauce in the morning. I came home to a fully cooked dish, that only required a little manual shredding, some rice and a vegetable side. Very nice!

Now for the shameful waste. I forgot to include this stuff last week, so the list is a bit bloated.

Shameful waste tally:

  • a half a chayote
  • a couple of old avocadoes

I was sad to have to throw these things out; there was really no reason for the waste. These are ingredients that we enjoy, that we were using up quickly over the last few months. My guess is that I haven’t made any tacos from my Mexican cookbook lately, and therefore the chayote and avocadoes were neglected. Boo!

Wanna join in? Just leave a comment on the Stephfood Facebook page! Every week, I’ll post an update of my progress, and I’d love it if you would too!

This month, cleaning will ensue!

Delicious, delicious cleaning!

Spring Cleanup! (Week 2)

Lobster -raw tails

This week doesn’t look as impressive as last week… I wasn’t home to cook much!

Use-it-up tally:

  • 3 wee frozen lobster tails
  • 2 frozen pitas (to eat with my leftover babaghanoush!)

Yeah, pretty pathetic. I’m sure I’ll be cooking more next week, and have plans to use up more of my freezer contents. Trying to decide whether I’m more in the mood for Persian or Moroccan…

Now for the shameful waste. I forgot to include this stuff last week, so the list is a bit bloated.

Shameful waste tally:

  • frozen chopped lemongrass (seriously, don’t bother freezing it!)
  • frozen bread ends (just prolonging their agony)
  • leftover Mansaf sauce (couldn’t freeze it, didn’t need it all in the leftovers)

I’m eyeing some really old Bacardi drink mixes in the freezer… I really hate throwing things out, but I don’t see myself ever using these up! I’d rather have a nicely chilled gin and tonic on a hot summer day.

Wanna join in? Just leave a comment on the Stephfood Facebook page! Every week, I’ll post an update of my progress, and I’d love it if you would too!

This month, cleaning will ensue!

Delicious, delicious cleaning!

Spring Cleanup! (Week 1)

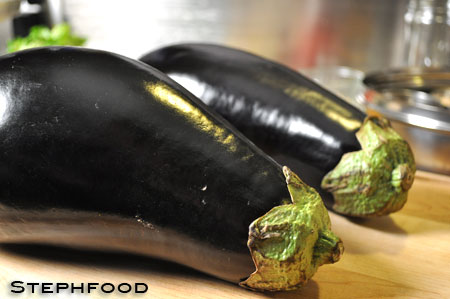
Eggplants

I keep lamenting the state of my freezer. I know, deep down in my heart, that it will never be “tidy” – not with me as its keeper. There are things in there that I wouldn’t even recognize had I not labelled it myself.

It’s time to do something about it.

This month, I’m doing a Spring Clean challenge. It starts with a little inventory… me, the crazy freezer archaeologist, digging through the remnants of a forgotten great idea. It ends each week with a tally of the items I was able to happily use up.

There may also be a little bit of waste-shaming thrown in for good measure. A use-it-up challenge is nothing without an accompanying food waste challenge. (You mean I can’t just empty the contents of my freezer into the trash and claim victory!?)

Wanna join in? Just leave a comment on the Stephfood Facebook page! Every week, I’ll post an update of my progress, and I’d love it if you would too!

This month, cleaning will ensue!

Delicious, delicious cleaning!

SPRING CLEANUP: WEEK ONE UPDATE

This was pretty easy, as I had LOTS to choose from. Here’s what I managed to use up.

  • a bag of shredded purple cabbage (used in soup)
  • a partial bag of frozen corn (used in soup)
  • 1 container of vegetable broth (used in soup)
  • 2 bags of cooked sweet potato (used in tagine)
  • 2 cups of cooked chick peas (used in tagine)
  • 5 halved apricots (used in tagine)
  • roasted eggplants (used in babaghanoush)

I’m pretty happy with my progress so far. As you can see, things like soups and stews offer a great way to use stuff up. They’re pretty forgiving.

My favourite on the list – by far – is the babaghanoush. I wasn’t sure how it was going to turn out; my eggplant was roasted and frozen in 2010 (SHAME!). When it was thawing, I wasn’t even sure it would be worth trying to use in a dish. Luckily, it was in great shape and had no signs of freezer burn and tasted fine.

Until next week…

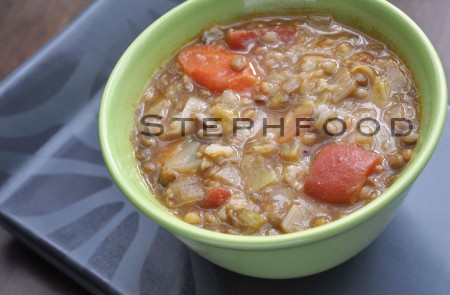
3-Grain Soup

3-Grain Soup

A couple of years ago, I only had two soup recipes – and I only used them once or twice a season.

This year, I think I’ve tried twenty new soup recipes, and have remade a few of them.


I’m not really into sipping cosommé (do people do that??). I like a soup that eats like a meal, but doesn’t come in a ready-made gelatinous blob. I’m not sure where the dividing line between soup and stew is, but I think I’m clumsily walking along it.

This soup was a great find, because it allowed me to use a few ingredients I don’t normally buy (like wheat berries and le puy lentils). Do you really need to buy le puy lentils? I don’t think so. I’ve made the soup twice now: once with le puy lentils; and once with brown lentils. Both were great. This is my first time cooking le puy lentils, so I haven’t quite formed an opinion of them.

If you’re not sure whether you’ll ever use wheat berries or lentils again, go to your local bulk store and buy just the amount you need. I do that to save money, and cupboard space.

The amount of garlic in it may sound shocking, but don’t skimp! The garlic mellows out while it cooks, and lightly flavours the soup. I prefer to mash the whole cloves in my bowl just before I eat – it’s less startling than a mouthful of garlic, and nicely seasons the rest of the soup.

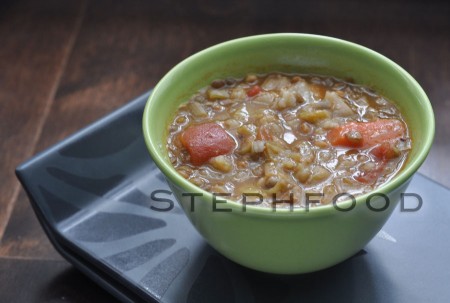
3-Grain Soup

3-Grain Soup

One tip – don’t undercook the soup. You might think that the rice should be intact, but I would disagree. I tested the soup with the rice intact, and the broth seemed a little thin. A little more cooking, and the rice starts to break down and thicken the soup. You don’t need the rice to stay perfect in order to have a nice texture – the lentils and the wheat berries do just fine in that regard.

Where to buy in Toronto?

  • Le puy lentils – I thought I should be able to find these at Bulk Barn, or Loblaws, but no luck. I got them from Rube’s at St. Lawrence Market. You should be able to find them at ‘finer’ bulk stores.
  • Wheat Berries – These are pretty easy to find. I got mine at Bulk Barn, but I think you can find them at Rube’s. You might be able to get them from grocery stores.


3-Grain Soup

Source: Adapted from this recipe.

6-8 servings

Ingredients:

  • 2-3 medium leeks, white parts only, halved lengthwise and sliced (3-4 cups of sliced leek)
  • 2 medium carrots, cut into 1/2-inch pieces
  • 2 tablespoons extra-virgin olive oil
  • 2 bay leaves
  • 1/2 teaspoon thyme
  • Fine sea salt
  • 14-ounces canned peeled whole tomatoes, crushed, with juices
  • 6 cups cold water or light-flavoured stock
  • 1 head of garlic, separated into whole peeled cloves
  • 1/3 cup brown rice
  • 1/3 cup le Puy lentils
  • 1/3 cup wheat berries
  • Freshly ground pepper

Preparation:

  1. Heat oil in a preheated, heavy soup pot.
  2. Add the leeks, carrots, olive oil, bay leaves, thyme and 1 teaspoon of salt. Cover and cook over low heat until softened.
  3. Add the tomatoes with their juices, the water/stock and garlic and bring to a boil over medium heat.
  4. Turn the heat down to low, add the rice, lentils and wheat berries, cover and simmer until the grains are tender, 45 minutes to 1 hour.
  5. Discard the bay leaves, season with salt and pepper and serve.

Vietnamese Vegetable Curry (Cà Ri Chay)

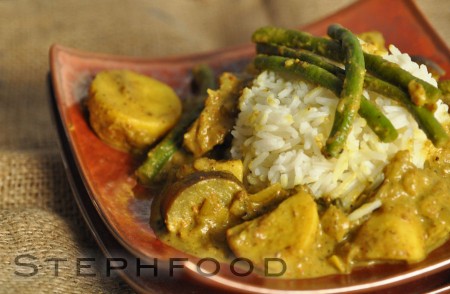
Vietnamese Tofu Curry

This Vietnamese curry brings me back many years. The mix of savoury spices and rich root vegetables was a surprise when I first tried it. It reminds me of my first years in Toronto, trying new cuisines and opening my eyes.

I think the first Vietnamese dish I ever tried was a vegetarian curry. A group of co-workers filed into the (now gone) Peach Garden restaurant around the corner, and I had NO IDEA what to get. Being veg at the time, I was happy to be able to narrow down my options.

Vegetable curry, with fake “meat”, sounded like a good idea to me.

It was incredible. I wasn’t able to put my finger on what made it so special. There were the root veggies – I knew they weren’t all potato, but I had never tasted these flavours before. I figure they were an assortment of white-fleshed yams and purple-veined taro.

It was the sauce. Like, and yet incredibly unlike the Indian and Thai curries that I was becoming familiar with. Maybe more like a marriage of the two?

When looking at the list of spices in the curry powder, it’s not hard to imagine why: a healthy dose of turmeric (hello, yellow!) mixed with star anise, cloves, coriander, nutmeg and cinnamon. As I prepared my curry powder, I was a little worried that it would be too cinnamon. My freshly ground cinnamon was incredibly pungent, and seemed to overpower the mix at first. I shouldn’t have worried; it worked perfectly.

If you have a favourite Vietnamese curry powder, feel free to use it here. I have linked to the recipe that I use, and can vouch for it.

Eating the curry brought me back to my early days in Toronto. This is where I first fell in love with curries – Thai, Indian, Vietnamese (and, eventually, others!).

This is also where I decided I had to learn to make them myself…

Vietnamese Tofu Curry (Cà Ri Chay)

This dish can easily be made vegetarian/vegan by omitting the fish sauce (and using a vegetable broth) and gluten-free by omitting the seitan. These changes won’t drastically change the dish.

4-6 servings

Ingredients:

  • 2 teaspoons vegetable oil or coconut oil
  • 1 block extra firm tofu, chopped into 1″ pieces
  • 3 shallots, chopped
  • 1-2 cups chopped mushrooms (optional)
  • 4 garlic cloves, chopped
  • 4 Tablespoons Vietnamese curry powder
  • roasted chili flakes, to taste (optional)
  • salt, to taste
  • 2 chinese eggplants, cubed
  • 1-2 cups gluten (seitan) pieces (optional)
  • 2 cups root vegetables, peeled and cubed (sweet potato, potato, taro)
  • 1 lemongrass, cut into 3″ lengths and bruised (a mallet or a pestle work well)
  • 2″ piece of ginger, sliced thickly
  • 3 kaffir lime leaves or bay leaves
  • 1-2 teaspoons fish sauce
  • 1.5 cups of light broth (like vegetable or chicken – can even use water)
  • 400 mL of coconut milk
  • 1 cup green beans or long beans, cut to 2-3″ lengths
  • scallions, fresh cilantro and/or Thai basil to serve

Preparation:

  1. Heat oil in a stir fry pan, over medium-high heat. Fry tofu until browned on all sides, and a bit crispy. Remove and set aside.
  2. Add a bit more oil to the pan. Sauté shallots and mushrooms over medium-high heat, until liquids are released. Add chopped garlic, and sauté for about a minute.
  3. Add the curry powder, chili flakes and a pinch of salt. Stir regularly, and sauté for one to two minutes.
  4. Add eggplant, gluten (seitan) and potatoes and mix well.
  5. Add lemongrass, ginger, kaffir lime leaves, fish sauce and broth. Mix well and simmer, covered, for 10 minutes.
  6. Add the coconut milk, and simmer uncovered until root vegetable pieces are tender. The sauce should be fairly thick, similar in consistency to a milkshake. If the sauce is a bit too thick for your taste, add a little bit of water.
  7. Add beans in the last 10 minutes of cooking. Try to remove the lemongrass pieces and ginger.
  8. Add tofu and some of the Thai basil just before serving.
  9. Serve over rice, topped with some scallions, cilantro and/or Thai basil.

Shakshuka

Shakshuka

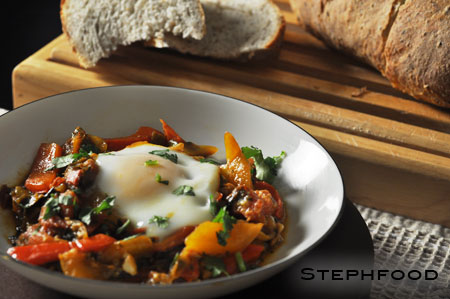
Shakshuka is a North African dish that is mostly eggs cooked in tomato sauce – with other things added to it to make it interesting – eaten with bread. In this case, we added colourful bell peppers, onions, and herbs. Incredibly simple – but so very good.

This recipe is a sort of “cookbook author audition” for me. There’s this cookbook I want, and the recipes look good and the photos are enticing, and the reviews have been great – but I’m still wary. Haven’t we all tried a recipe that was nearly unfollowable (if that’s a word)? I don’t have enough shelf space for books like that, so I’m holding auditions.

I’ve been lucky enough to find some recipes posted online by said cookbook author, Yotam Ottolenghi, and I’m trying a few out to see if we’ll get along. Oh yes, I think we’ll get along just fine.

This particular recipe isn’t from Jerusalem –  the book I plan to buy. It was offered online by The Guardian (and possibly in his other book, Plenty, but I’m not sure if it’s the exact same recipe). I chose it because I’ve made Shakshuka before, and wanted to compare. To make things interesting, there’s also a video of him actually making the dish – yay!

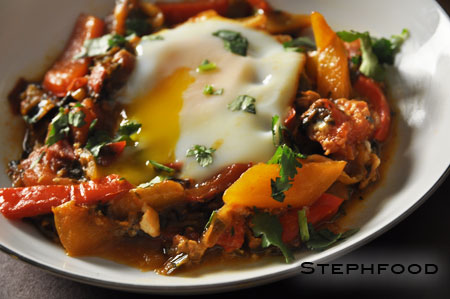
Shakshuka - close-up

A close look at the runny egg yolk

This one was fantastic. It made me want to go out and buy personal-sized cast iron pans so I can make this every day and not make a mess. Although, to be fair, there is no mess to be had now. We ate every bite, and sopped up every bit of sauce with delicious bread.

Of course this was incredibly satisfying on a cold winter night, but I can’t wait for the fresh and perfectly ripe tomatoes of summer. Heaven!

Get the recipe here:
Yotam Ottolenghi’s shakshuka recipe

A “Truly Mexican” Tomatillo Chipotle Salsa

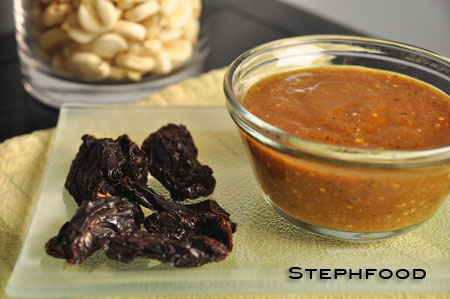
Tomatillo Chipotle Salsa and Moritas
I hadn’t had the urge to buy a cookbook since 2010…

When I saw Roberto Santibañez’s “Truly Mexican” cookbook at the Frida and Diego exhibit at the AGO, it looked like something I would enjoy and learn from. This book focuses on some of the basics of Mexican cooking, with most of the book dedicated to perfecting variations on sauces.

The first dishes I tried can both be described as “meats cooked in adobos”, using different recipes each time. I had never made an adobo before, and I think it opened my eyes to the possibilities of using chiles. The complex flavours can’t simply be measured in Scoville units.

My favourite thing to make with these “meats cooked in adobos”? Tacos. The meat was great on its own, with some sides, but it really had a chance to shine in the tacos. It also gave me an excuse to try another recipe from the book, one for whom a recipe can be found online if you are inclined to try. I highly recommend that you do.

Roasted Tomatillo Salsa with Chipotle and Roasted Garlic. The name alone sold me on it, and a quick glance at the recipe allayed any fear that the recipe would be challenging. I’m not even sure where to start with this, because it made THAT MUCH of an impact. It was the star of the tacos, without taking over. It was the zip atop my chili, on a cold evening. It was incredible over whitefish.

Yeah, I ate some right out of the bowl. I DON’T JUDGE YOU!

Tomatillo Chipotle Salsa

This salsa gets an incredible tang from the tomatillos, smokiness with a bit of heat from the dried and roasted chipotles, and an earthiness from the garlic that brings it all together. Amazeballs.

I do have to admit, however, that I did not include all of the suggested chipotles, out of fear that the salsa would be too spicy for my J’s delicate palate. Hahaha. Next time, I’ll go all out, and he’ll like it.

Maybe I’ll make some now. Writing this up is making me crave it!

In case you missed it, a version of the recipe can be found here: Roasted Tomatillo Salsa with Chipotle and Roasted Garlic

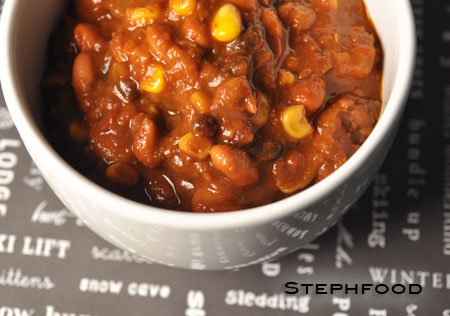
Slow-Cooker Chili (a.k.a. “Tough Beans”)

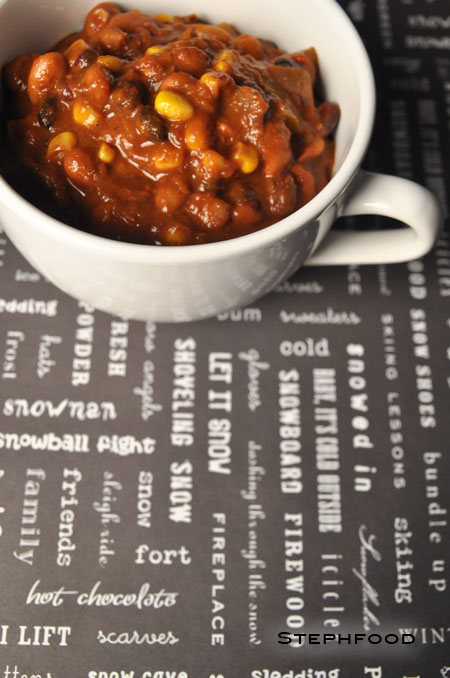
Slow-Cooker Chili

In my last post, I mentioned my frustration at the length of time it took to cook legumes from dried (soaked) in my slow-cooker. I’ve done some testing, and found a method that seems to work well.

I did a bit of Googling to see if other people had the same problem…

I should have known it was an “issue” when I saw so few recipes that started with dried beans. I found a range of possible causes, such as old beans, too much salt, and too much acid.

That last one rang a bell for me – too much acid. Of the beany dishes I had made so far, the ones that resulted in tough beans contained TOMATOES. The ones that cooked perfectly did not.

I formulated a test to confirm my theory… a reworking of the chili dish that didn’t cook as expected, full of tomatoes and spices and beans. The difference would not be in the ingredients, but in the process. I started by cooking the legumes in *some* of the ingredients and some broth… and added the tomatoes in later.

It worked!

Unfortunately, this is (again) not a dish that can be done start-to-finish on a weeknight, as it would take at least 9 hours if you cook it as intended – and you have to be there to add the ingredients after 3. Being the mindful person that I am, I have included some alternative instructions for those of you starting with a cooked legume. You can always start it the night before, just to cook the beans, put it in the fridge overnight and resume cooking the next day.

A quick note… Be careful about cooking legumes from dried/soaked, using too low of a temperature may not kill the toxin described in this article on the FDA website. Using the slow-cooker on low may not be enough.


Slow-Cooker Chili

Slow-Cooker Chili

6-8 servings

Ingredients:

  • 1 onion, chopped
  • 1 celery stalk, chopped
  • 2 garlic cloves, minced
  • 1 -2 tablespoons olive oil
  • 2 cups dried legumes, soaked overnight (or 4 cups cooked)
  • 2 bay leaves
  • 2-4 cups broth (can use water) – just enough to cover
  • 2 medium carrots, chopped
  • 1 cup corn kernels
  • 1 tablespoon sweet paprika
  • 1/2 tablespoon ground ancho chile (or another mild chile pepper)
  • 1 teaspoon cumin seeds (can also use ground)
  • 1/2 teaspoon coarse salt
  • 1 teaspoon dried oregano
  • 1/2 – 1tablespoon canned chipotles in adobo, chopped or puréed – optional
  • 28oz canned tomatoes, with juices
  • 1 green bell pepper, chopped

Preparation:

Note: if you are using pre-cooked or canned beans, omit the broth and skip steps 2 and 3.

  1. Add onion, celery, garlic, olive oil, soaked beans and bay leaves to the slow-cooker.
  2. Add enough broth to fully cover the beans.
  3. Cover, and cook on the slow-cooker on high for 3 hours.
  4. When the beans have finished, add the carrots, corn, spices, canned chipotles and tomatoes to the slow-cooker.
  5. Cover, and cook in the slow-cooker on high for 6 hours.
  6. In the last hour, add bell pepper. If the chili hasn’t thickened enough, you can take the lid off to allow some of the liquid to evaporate.
  7. Taste, and adjust the seasoning as needed.